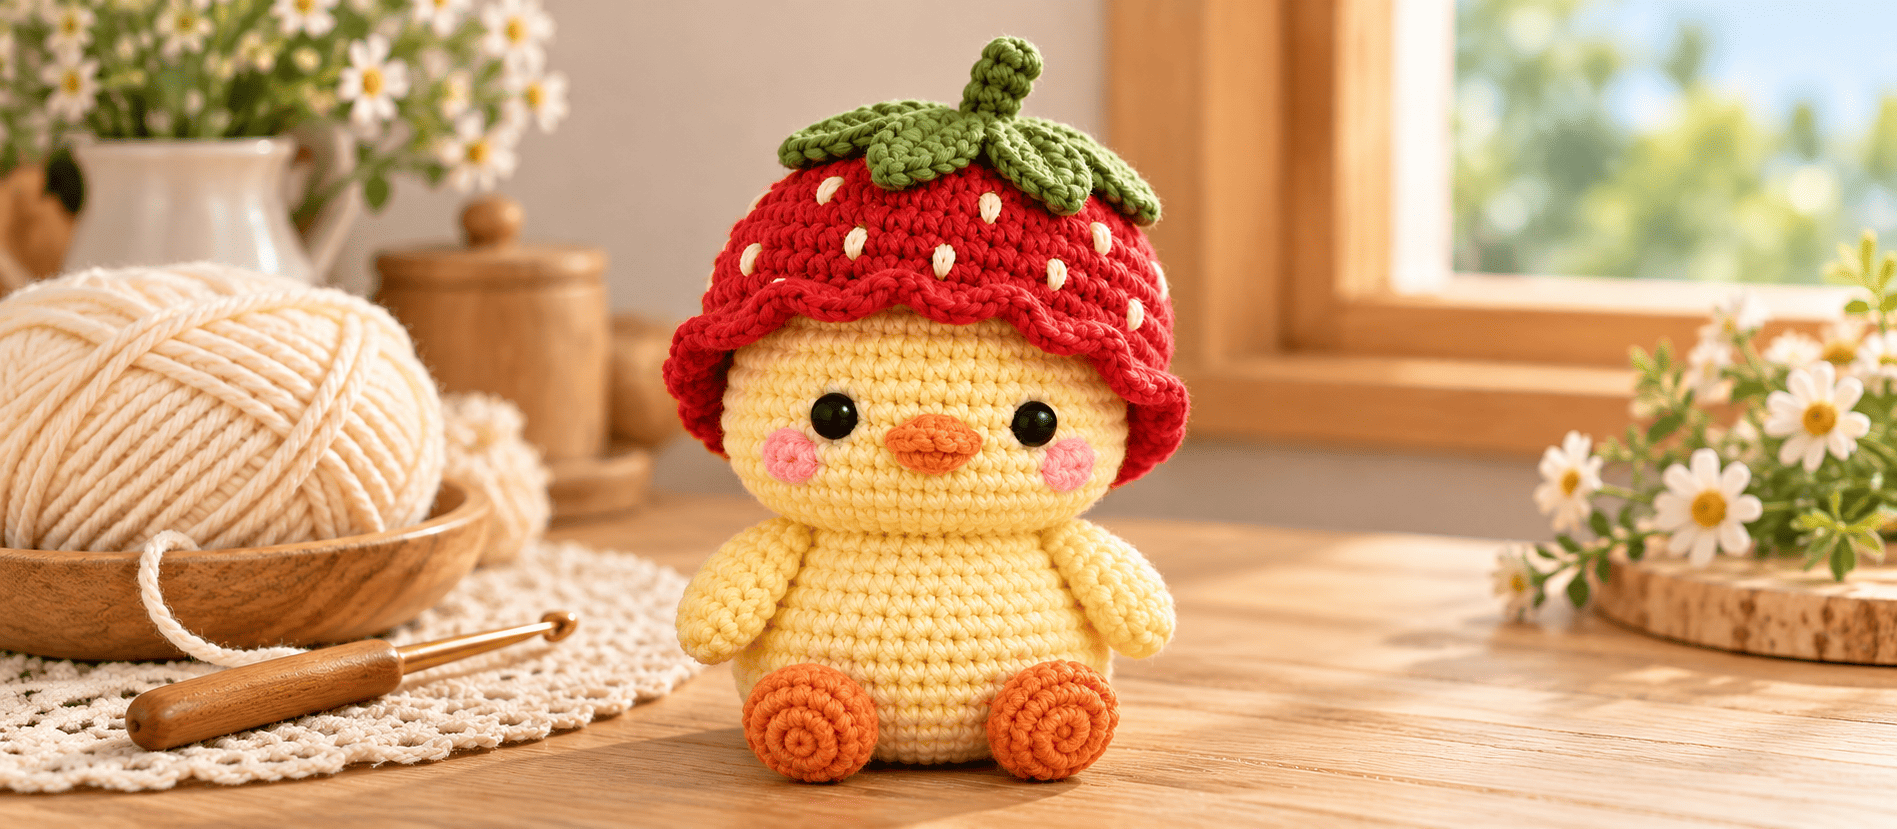
I have made a lot of crochet chicks. The first one looked like a lemon with a beak. The second leaned to the left like it had been out all night. The third, the one in this pattern, finally stood up straight and looked like it was proud of itself.
What changed was the shape. Most chick patterns use two round balls, one for the head and one for the body. I wanted a pear-shaped body, wide at the bottom and narrow at the top, so the chick sits upright without help. Then I gave it a removable strawberry hat, because a chick in a fruit hat is hard to resist, and a hat you can take off means one chick can wear many outfits.
This is a small project, about an afternoon of crochet if you work in front of a show. Nothing here is hard, but a few details make the difference between “homemade” and “handmade”, and I’ll point those out as we go.
Finished Size
- Chick height (without hat): approx. 4 in / 10 cm
- Hat height: approx. 2 in / 5 cm
- Width at the widest point: approx. 3.5 in / 9 cm
Skill Level
Beginner-friendly. You need magic ring, single crochet, increases, invisible decreases, and basic embroidery (straight stitches only). All rounds are worked in a continuous spiral unless noted.
Materials
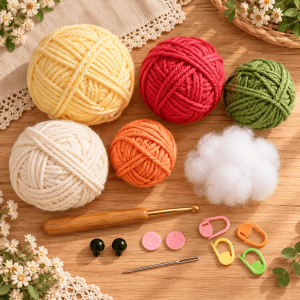
Yarn (DK weight / light #3, cotton or milk cotton):
- Color A (Butter Yellow): ~70 yd / 65 m. Body, head, wings.
- Color B (Apricot Orange): ~20 yd / 18 m. Feet and beak.
- Color C (Raspberry Red): ~35 yd / 32 m. Hat.
- Color D (Moss Green): ~15 yd / 14 m. Leaves and stem.
- Color E (Cream): a small scrap for the strawberry seeds.
Hook: 2.5 mm
Notions:
- 2 black safety eyes, 8 mm
- Scrap of pink felt for cheeks (or pink floss)
- Polyester fiberfill
- Optional: poly pellets in a small nylon bag for weight
- Yarn needle, stitch markers, fabric glue (if using felt)
Gauge
With Color A, 6 sc = 1 in / 2.5 cm. Gauge isn’t critical, but your fabric must be dense. If fiberfill peeks through, drop down a hook size. For me this is the one rule that matters in amigurumi.
Abbreviations
- MR: magic ring
- sc: single crochet
- inc: 2 sc in the same stitch
- dec: invisible decrease (front loops only)
- BLO: back loop only
- FO: fasten off
- sl st: slip stitch
Pear-Shaped Body
With Color A:
- Rnd 1: 6 sc in MR (6)
- Rnd 2: inc around (12)
- Rnd 3: (sc 1, inc) x6 (18)
- Rnd 4: (sc 2, inc) x6 (24)
- Rnd 5: (sc 3, inc) x6 (30)
- Rnd 6: (sc 4, inc) x6 (36)
- Rnd 7: (sc 5, inc) x6 (42)
- Rnds 8–14: sc around (42)
- Rnd 15: (sc 5, dec) x6 (36)
- Rnds 16–17: sc around (36)
- Rnd 18: (sc 4, dec) x6 (30)
- Rnds 19–20: sc around (30)
- Rnd 21: (sc 3, dec) x6 (24)
- Rnds 22–23: sc around (24)
FO and leave the body open. If you’re adding pellets, put the bagged pellets at the very bottom now, then stuff firmly on top. A chick with a weighted bottom will sit up and stay there. I learned that after a few of mine toppled off the shelf.
Head
With Color A:
- Rnds 1–6: work as Rnds 1–6 of the body (36)
- Rnds 7–12: sc around (36)
Insert the eyes between Rnds 9 and 10, about 9 stitches apart. Wide-set eyes make the chick look sweeter. Close-set eyes make it look suspicious, which I found out the hard way.
- Rnd 13: (sc 4, dec) x6 (30)
- Rnd 14: (sc 3, dec) x6 (24)
- Rnd 15: (sc 2, dec) x6 (18)
Stuff firmly.
- Rnd 16: (sc 1, dec) x6 (12)
- Rnd 17: dec x6 (6)
FO, close, and weave in the end.
Wings (make 2)
With Color A, ch 5.
- Rnd 1: 2 sc in 2nd ch from hook, sc in next 2 ch, 3 sc in last ch. Working along the opposite side of the chain, sc in the next 3 loops, 1 sc in the last loop (10)
- Rnd 2: sc 3, inc x3, sc 3, inc x1 (14)
- Rnds 3–4: sc around (14)
FO with a long tail. Don’t stuff. Press flat and the wing becomes a little teardrop.
Feet (make 2): The Rolled Swirl
This is my favorite trick in the pattern. A circle with a spiral is hard to get neat. A short strip rolled up gives a clean swirl on the face every time.
With Color B, ch 19.
- Row 1: sc in 2nd ch from hook and across (18). Ch 1, turn.
- Rows 2–4: sc across (18). Ch 1, turn on Rows 2–3.
FO, leaving a long tail. Roll the strip tightly from one short end, with the stitches facing outward, and sew through the base a few times so it holds its spiral.
Beak
With Color B, ch 4.
- Rnd 1: sc in 2nd ch from hook, sc in next ch, 3 sc in last ch, sc in the next 2 ch loops on the opposite side (7)
- Rnd 2: sc around (7)
FO with a tail. Flatten it into a small oval.
Strawberry Hat
With Color C:
- Rnd 1: 6 sc in MR (6)
- Rnd 2: inc around (12)
- Rnd 3: (sc 1, inc) x6 (18)
- Rnd 4: (sc 2, inc) x6 (24)
- Rnd 5: (sc 3, inc) x6 (30)
- Rnd 6: (sc 4, inc) x6 (36)
- Rnd 7: (sc 5, inc) x6 (42)
- Rnds 8–13: sc around (42)
- Rnd 14: (sc 5, dec) x6 (36)
- Rnd 15: sc around (36). Sl st in the next stitch.
FO and weave in the end. Try the hat on your finished head before you close up Rnd 15. Heads vary with stuffing, and a hat that is a little too big is better than one that squashes the face.
Seeds: with Color E, make small vertical straight stitches over 2 rounds, spaced 3 stitches apart. Stagger each row so the seeds fall between those above. Keep them short and slightly uneven, because strawberry seeds are not perfect.
Leaves and Stem
Leaf (make 5) with Color D, ch 8:
- sl st in 2nd ch, sc 1, hdc 2, sc 1, sl st 1, then 3 sl st in the last ch (tip). Along the opposite side: sl st 1, sc 1, hdc 2, sc 1, sl st 1.
FO with a long tail.
Stem: with Color D, MR 6, sc around for 4 rounds (6). FO, leaving a tail.
Arrange the five leaves like flower petals, with their bases touching, and stitch the bases together in a ring. Then sew the leaf star onto the top of the hat and the stem in the center.
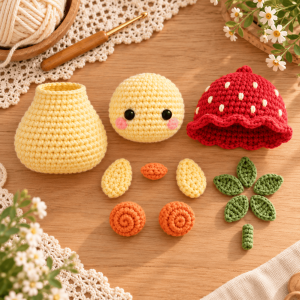
Assembly
- Head to body: sew the head over the open top of the body, going around the 24 stitches. Add a little more stuffing through the gap before you close it.
- Beak: place it at Rnds 10–11, centered between the eyes. Pin it first and sew it on with small stitches.
- Cheeks: glue or stitch the pink felt circles just outside the eyes, level with the beak.
- Wings: sew them on the sides, a little below the neck, tilted slightly outward.
- Feet: sew the swirls on the bottom front, so the chick looks like it is sitting.
Personal Notes From My Hook
- Yarn matters. Milk cotton gives the soft, matte stitches you see here. Acrylic works, but it looks shinier and the seeds sink in a little.
- Don’t rush stuffing. I add small pieces of fiberfill, one at a time. Big clumps make bumps, and bumps show in light yellow.
- Take photos in daylight. Yellow and red look great near a window and flat under a lamp.
Ways to Switch It Up
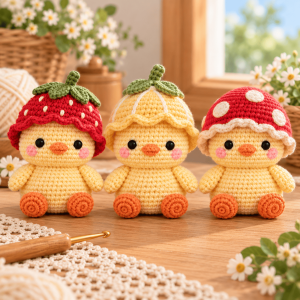
- Lemon hat: use a yellow-green with white stitched lines.
- Mushroom hat: use cream seeds on a soft red cap, no leaves.
- Keychain: skip the feet and add a ribbon loop under the hat.
- Bigger chick: use worsted yarn and a 3.5 mm hook with the same counts for a ~6 in chick.
If you make this chick, I would love to see it. Every one comes out a little different, and that is what I love about handmade. Happy hooking!