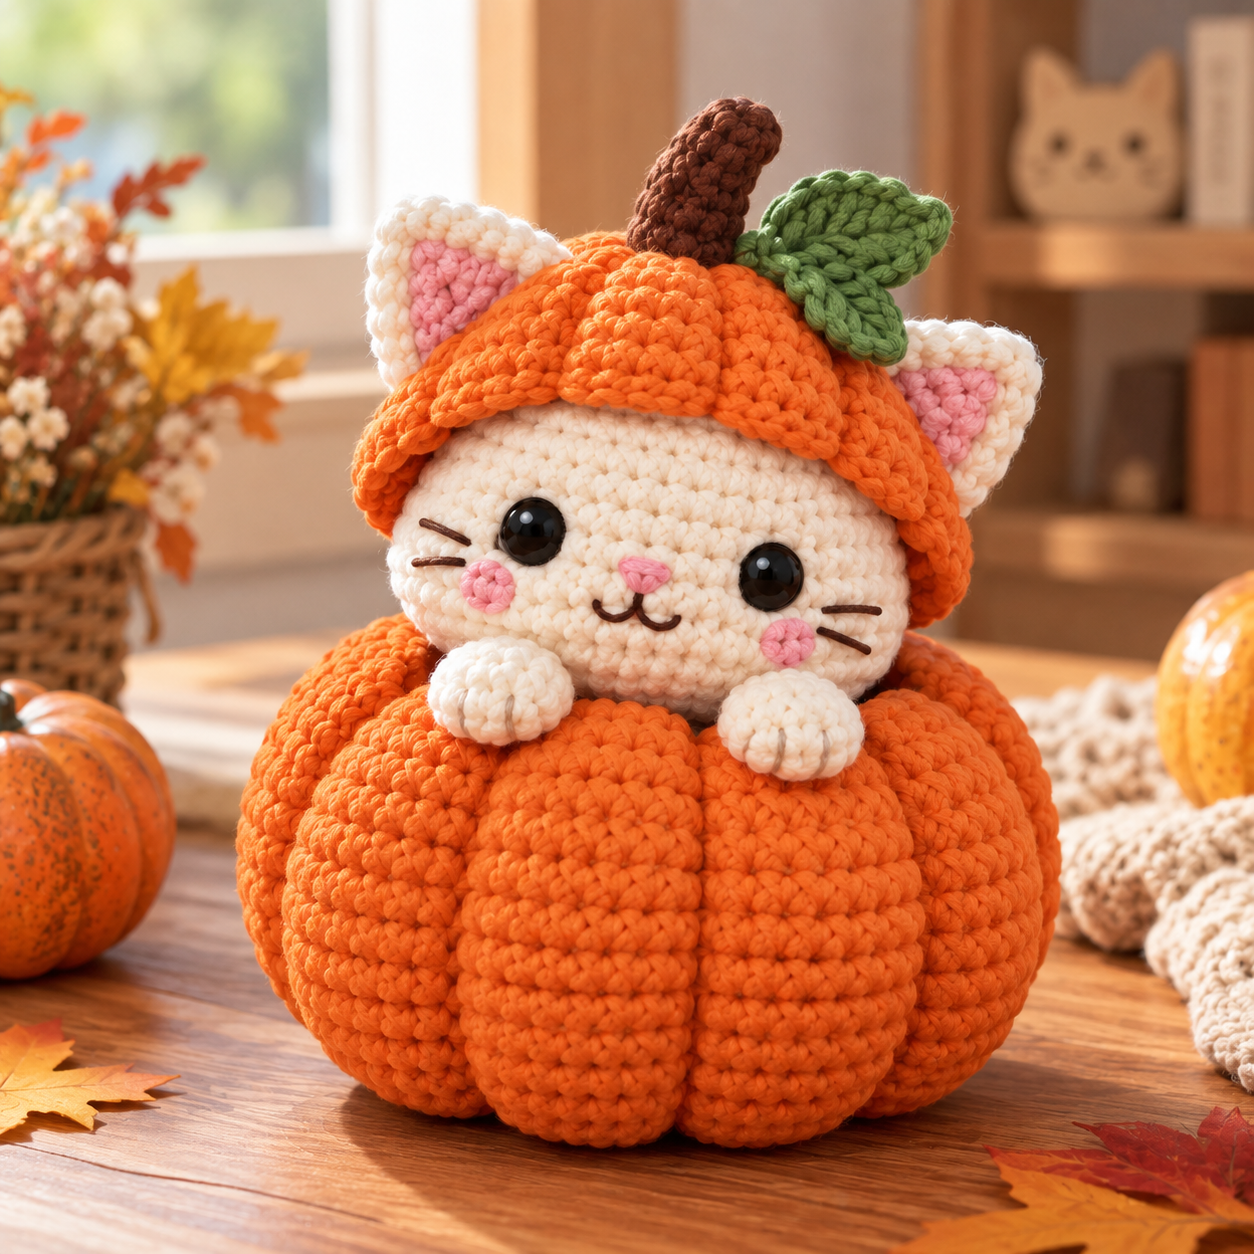
Every autumn, I find myself scrolling through Pinterest looking for a small, cozy project I can finish in an evening or two. I just wanted something comforting that isn’t another oversized scarf. This year, this little cream cat sitting inside a fat orange pumpkin, wearing a tiny pumpkin as a hat, completely stole my heart.
It looks a bit silly, and honestly, that’s why I love it so much. The pattern is actually way simpler than the final photo suggests. There are no tricky stitches here—just basic single crochet, increases, and decreases worked in the round. If you’ve ever made a simple amigurumi ball before, you can absolutely make this.
It sits happily on a shelf, guards your desk while you work, or makes a lovely last-minute gift since there’s no tedious sewing of tiny limbs involved.
What You’ll Make
The Pumpkin Cat is built from six small pieces:
- Pumpkin body (stuffed)
- Round cat head
- Two pointed ears (with a pop of pink inside!)
- Two little front paws
- Pumpkin-shaped hat
- Brown stem & green leaf
Everything is worked in continuous rounds except for the leaf, which is a quick, chain-based flat piece.
Finished Size
The exact size depends on your yarn weight and tension (yarn therapy is personal, after all!). As a rough guide, using worsted weight yarn and a 3.0 mm hook (with 30 stitches at the widest point of the pumpkin), it fits right in your palm—around 3 in / 7–8 cm tall.
Skill Level: Beginner-Friendly
You only need to know how to:
- Make a magic ring (MR)
- Single crochet (sc)
- Increase (inc) and decrease (dec)
- Work in the Back Loop Only (BLO)
- Slip stitch (sl st) and chain (ch)
Materials & Tools
- Yarn: Worsted weight (or DK if you want a tinier, tighter cat).
- Orange: Pumpkin body and hat
- Cream: Cat head and paws
- Brown: Stem
- Green: Leaf
- Pink: Inner ears and blushing cheeks
- (A stash-busting dream! You only need a small ball of orange and cream, and just scraps for the rest).
- Hook: 2.5–3.5 mm. Pro-tip: Choose a hook a size or two smaller than your yarn label suggests to keep the stitches tight so the fiberfill doesn’t peek through!
- Notions: 2 safety eyes (8–10 mm), polyester fiberfill, yarn needle, scissors, and optional dark thread for embroidery.
Abbreviations (US Terms)
- MR: magic ring
- sc: single crochet
- inc: increase
- dec: decrease
- sl st: slip stitch
- ch: chain
- BLO: back loop only
- FO: fasten off
- ( … ) x6: repeat instructions inside brackets 6 times
The Pattern
Pumpkin Body (Orange)
- R1: 6 sc in MR (6)
- R2: inc x6 (12)
- R3: (1 sc, inc) x6 (18)
- R4: (2 sc, inc) x6 (24)
- R5: (3 sc, inc) x6 (30)
- R6–R10: sc around (5 rounds) (30)
- R11: (3 sc, dec) x6 (24)
- R12: (2 sc, dec) x6 (18)
- R13: (1 sc, dec) x6 (12)
- R14: dec x6 (6)
- FO and weave in the end. Stuff lightly—you want it plump but squishy enough so sewing the head on later isn’t a battle!
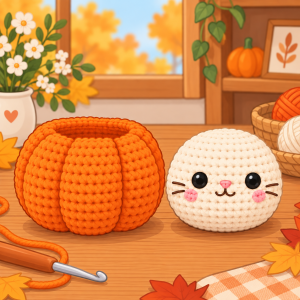
Cat Head (Cream)
- R1: 6 sc in MR (6)
- R2: inc x6 (12)
- R3: (1 sc, inc) x6 (18)
- R4: (2 sc, inc) x6 (24)
- R5–R8: sc around (4 rounds) (24)
- R9: (2 sc, dec) x6 (18)
- R10: (1 sc, dec) x6 (12)
- R11: dec x6 (6)
- FO, leaving a long tail for sewing.
- Safety eyes tip: Pop them in between rounds 6 and 7, about 5 stitches apart. Play around with the placement before snapping the backs on—cats look extra sweet when their eyes are low and wide! Stuff firmly and close up.
Ears (Make 2)
(Note: We are going to carry the pink yarn inside Round 3 and 4 just for a few stitches to create that perfect rosy inner ear, while keeping the back of the ear cream!)
- R1: In Cream, 4 sc in MR (4)
- R2: In Cream, inc x4 (8)
- R3: In Cream: 2 sc, inc. Switch to Pink: 2 sc. Switch back to Cream: inc, 2 sc (10)
- R4: In Cream: 3 sc. Switch to Pink: 3 sc. Switch back to Cream: 4 sc (10)
- FO, leaving a long tail. Do not stuff. Flatten them out and pinch into a soft triangle shape when assembling.
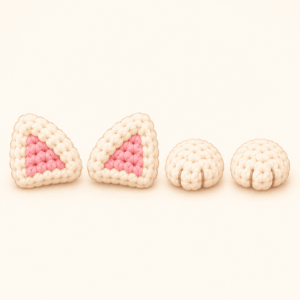
Front Paws (Make 2) (Cream)
- R1: 6 sc in MR (6)
- R2: (1 sc, inc) x3 (9)
- R3–R4: sc around (2 rounds) (9)
- R5: (1 sc, dec) x3 (6)
- FO, leaving a tail. Add just a tiny pinch of stuffing so they stay soft and pillowy.
Pumpkin Hat (Orange)
- R1: 6 sc in MR (6)
- R2: inc x6 (12)
- R3: (1 sc, inc) x6 (18)
- R4: (2 sc, inc) x6 (24)
- R5: 24 sc in BLO (24) (This creates that lovely crisp ridge for the cap shape!)
- R6: (3 sc, inc) x6 (30)
- R7: 30 sc (30)
- FO. No stuffing needed here—it’s just a cute little beret for our cat.
Stem (Brown)
- R1: 4 sc in MR (4)
- R2–R4: 4 sc around (3 rounds) (4)
- FO, leaving a tail for sewing.
Leaf (Green)
- Ch 5, sl st in second ch from hook, sc in next 3 chains, sl st in the very first ch to round it off. FO.
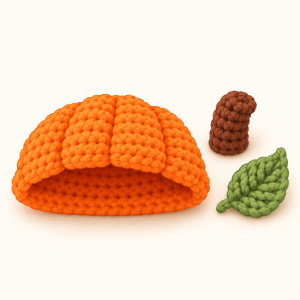
Assembly & Finishing Touches
- Bring the face to life: Use a scrap of pink yarn to embroider a tiny triangle nose right between the eyes. Add a little ‘v’ mouth below it and a couple of whisker lines if you like.
- Attach Head & Paws: Sew the head securely to the top of the pumpkin. Stitch the two little paws right at the front, resting on the pumpkin’s rim so it looks like the cat is peeking out.
- Ears & Hat: Sew the ears to the sides of the head. Place the pumpkin hat on top so the ears pop out nicely from underneath, then sew the hat down. Attach the brown stem and green leaf right to the center top.
Maker’s Tips for a Polished Look
- Rosy Cheeks: Take a makeup brush with a tiny bit of actual blush (or pink yarn) and gently dab it right under the eyes. It makes a world of difference!
- Pumpkin Segments: Want a more “carved” look? Before sewing the head on, take a long strand of orange yarn, thread it through the center of the pumpkin from top to bottom, wrap it around the outside, and pull slightly to indent the sides.
- Color Play: Don’t limit yourself to orange! A pale white “ghost” pumpkin or a deep rust tone looks gorgeous for a modern fall vibe.
And there you have it—your very own Pumpkin Cat! I love how fast this works up, and it’s a wonderful way to use up those stubborn yarn scraps in your stash.
If you make one, please tag me or leave a comment below—I’d absolutely love to see your little feline creations. Happy crocheting!