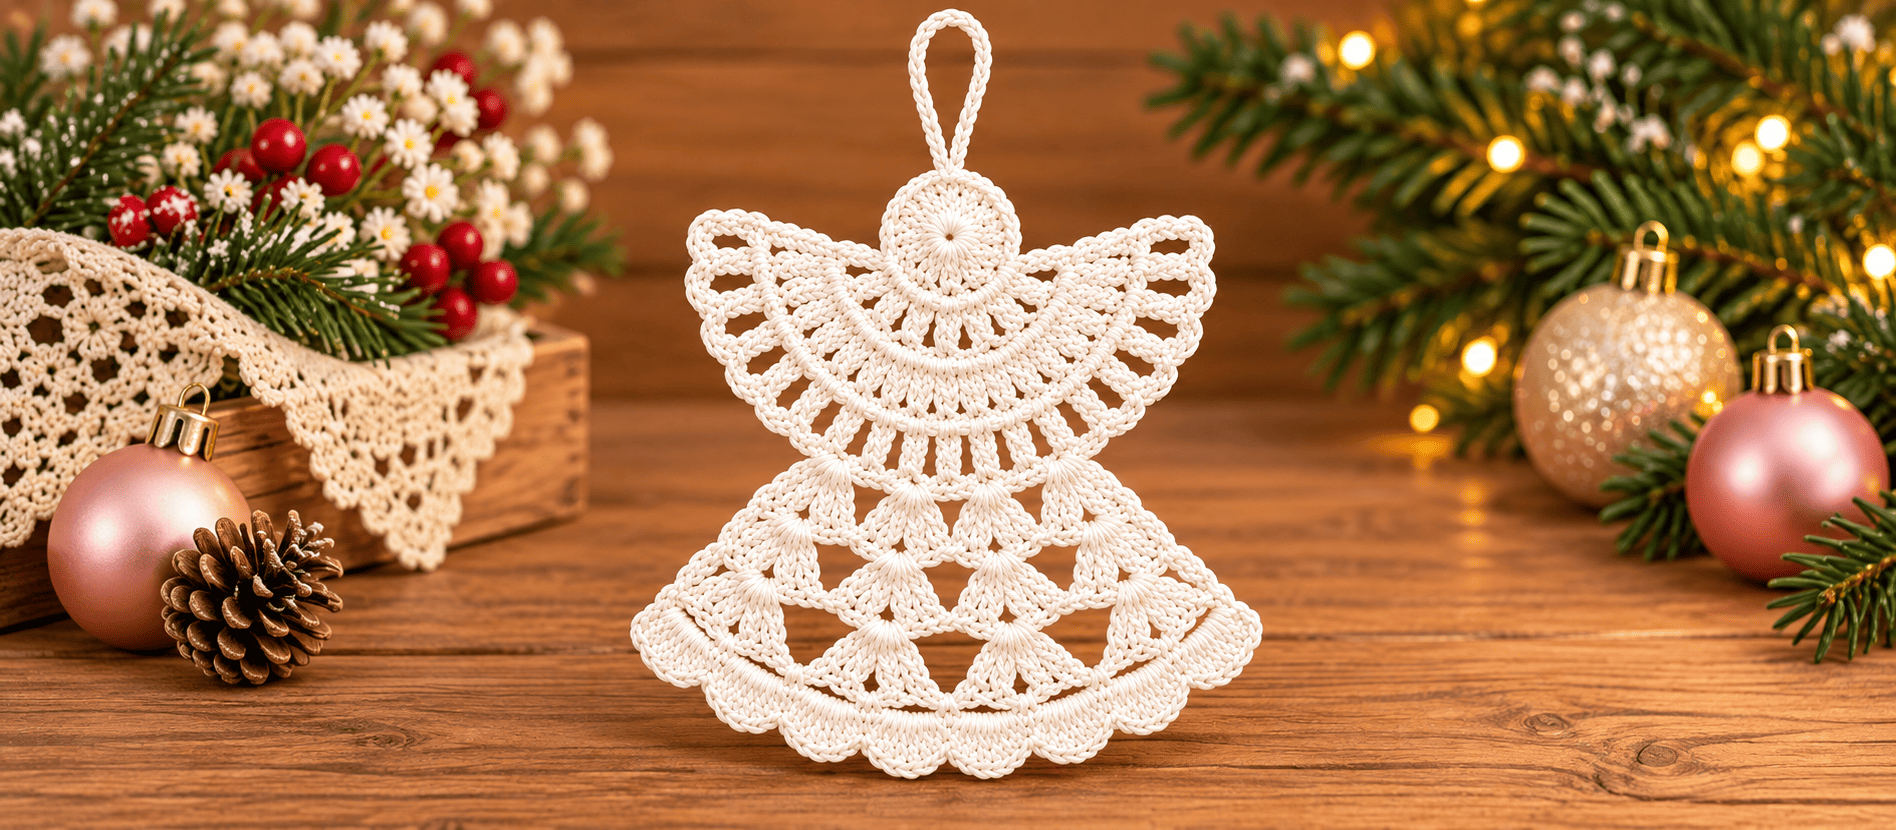
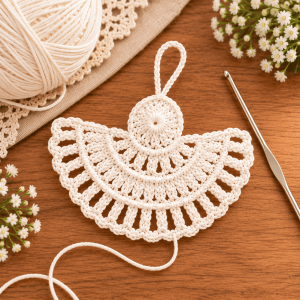
Every December I tell myself I’ll make a few simple ornaments, and every December I end up three nights deep into lace. This angel is the reason. I wanted a small white thread angel with a round head, a lacy fan of wings and a scalloped skirt. But every pattern I found had me crocheting the wings, body and head separately and then sewing them together with a needle and a lot of swearing.
So I worked it out as one piece. You start at the head, build the wings straight off the back of it, drop into the bodice, and flare out into the skirt. There’s nothing to sew except the loop of the hanger, and it’s already crocheted. It’s a little fiddly in the middle, but once you see the fan form, you’ll get it.
Finished Size
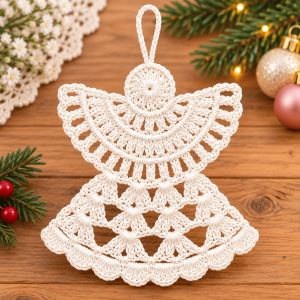
- Width (wing tip to wing tip): approx. 4.5 in / 11.5 cm
- Height (excluding loop): approx. 4.5 in / 11.5 cm
- Hanging loop: approx. 1.5 in / 4 cm
Sizes are after starching. Unstarched, the angel will look a bit smaller and softer.
Skill Level
Intermediate. You need to be comfortable with magic ring, dc, treble, double treble, working in the back loop only, and reading a pattern with turning chains. Thread crochet is unforgiving at first, but the stitches themselves are basic.
Materials
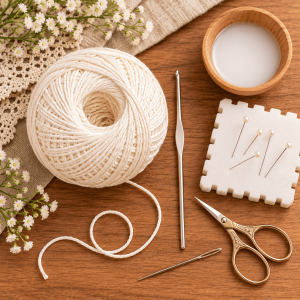
- Thread: White size 10 mercerized cotton crochet thread, about 60 yd / 55 m
- Hook: 1.5 mm steel hook (US 7)
- Tapestry needle (for weaving in ends)
- Fabric stiffener or a homemade starch (see Finishing)
- Rust-proof pins and a foam board or blocking mat
- Plastic wrap
A note on thread color: Use bright white, not ecru or cream. The finished angel in my photos is crisp, snowy white, and cream makes it look vintage rather than fresh. I also prefer mercerized cotton because it has a sheen, and it holds starch beautifully.
Gauge
Gauge isn’t critical here, but your stitches should be tight and even. Work 10 sc in a row with this thread and hook, and it should measure about 0.75 in / 2 cm. If your fabric looks loose or floppy, go down to a 1.25 mm hook. Loose stitches won’t hold their shape once starched.
Abbreviations (US terms)
- ch — chain
- sl st — slip stitch
- sc — single crochet
- dc — double crochet
- tr — treble crochet
- dtr — double treble (yarn over 3 times)
- sc2tog — single crochet 2 together
- BLO — back loop only
- MR — magic ring
- st(s) — stitch(es)
- sp — space
Turning chains: a ch 3 at the start of a row counts as a dc. A ch 4 counts as a tr, and a ch 5 counts as a dtr.
Head and Hanging Loop
- Rnd 1: Make a MR. Ch 3 (counts as dc), 11 dc in the ring. Join with a sl st to the top of the ch 3. (12 dc)
- Rnd 2: Ch 3, dc in the same st. 2 dc in each st around. Join. (24 dc)
- Rnd 3: Ch 3, 2 dc in the next st. Dc in the next st, 2 dc in the next st. Repeat to the end. Join. (36 dc)
- Rnd 4: Ch 1, sc in each st around. Join with a sl st to the first sc. Do not fasten off. (36 sc)
Call the first sc of Rnd 4 st 1 and count around from there. We’ll need those numbers in a minute.
Hanging loop: Without turning, ch 20, then sl st back into st 1. Work 20 sc over the chain loop, then sl st into st 1 and fasten off. Weave in the tail.
Wings
The lower half of the head becomes the base of the wings. The wings are worked flat, turning at the end of each row.
- Row 1: Join thread with a sl st in st 10 of Rnd 4. Ch 3 (counts as dc), dc in each of sts 11–27. Turn. (18 dc)
- Row 2: Ch 1, 2 sc in the BLO of each dc across. Turn. (36 sc)
- Row 3: Ch 3, ch 1, dc in the next sc. Repeat 35 times. Turn. (36 dc and 35 ch-1 sps)
- Row 4: Ch 4 (counts as tr), ch 2, tr in the next dc. Repeat 35 times, working into each dc and skipping the ch-1 sps. Turn. (36 tr and 35 ch-2 sps)
- Row 5: Ch 1. Sc in the top of the turning ch. 2 sc in the next ch-2 sp, sc in the BLO of the next tr. Repeat to the end, but work 3 sc in the 18th ch-2 sp. (107 sc) Fasten off.
Why the 3 sc in the center space? That one extra stitch gives the wings a true center stitch (st 54) so the bodice sits exactly in the middle. I found this out the hard way, on a crooked first attempt.
Bodice
Skip the first 37 sts of Row 5. Join thread in st 38. You’ll work across the center 33 sts only, leaving the last 37 sts unworked as the wing tips.
- Row 6: Ch 3, ch 1, skip 1 st, dc in the next st. Repeat 16 times, ending in st 70. Turn. (17 dc and 16 ch-1 sps)
- Row 7: Ch 1, sc in each dc and each ch-1 sp across. Turn. (33 sc)
- Row 8: Ch 5 (counts as dtr), ch 2, skip 1 st, dtr in the next st. Repeat 16 times. Turn. (17 dtr and 16 ch-2 sps)
- Row 9: Ch 1, sc in the first dtr. Sc2tog over the next ch-2 sp and the next dtr. Repeat 16 times. Turn. (17 sc)
Row 8 gives you the long, open spokes that run from the wings down to the waist, and Row 9 gathers them in. Don’t skip the sc2tog. That’s what pinches the waist.
Skirt
- Row 10: Ch 1, sc in the first st. Skip 1 st, 5 dc in the next st, skip 1 st, sc in the next st. Repeat 4 times. Turn. (4 shells and 5 sc)
- Row 11: Ch 3, 4 dc in the same st (shell made). Sc in the 3rd dc of the next shell, 5 dc in the next sc. Repeat 4 times. Turn. (5 shells and 4 sc)
- Row 12: Ch 3, 4 dc in the same st. Sc in the 3rd dc of the next shell, 5 dc in the next sc. Repeat 4 times, then sc in the 3rd dc of the last shell and 5 dc in the last st. Turn. (6 shells and 5 sc)
- Row 13: Repeat the Row 12 method one more time. (7 shells and 6 sc, 41 sts)
- Row 14: Ch 1, 2 sc in the first st, sc in the BLO of each st across to the last st, 2 sc in the last st. Turn. (43 sc)
- Row 15: Ch 1, sc in the first st. Skip 2 sts, 5 dc in the next st, skip 2 sts, sc in the next st. Repeat 7 times. (7 scallops) Fasten off.
The BLO ridge in Row 14 makes the raised band above the hem. In every shell row, the shells land above the sc stitches below, and the sc stitches land in the shell centers. That offset creates the open triangles in the skirt.
Optional side edging: With the right side facing, join at the hem corner and sc evenly up one side edge to the waist (about 2 sc per row end). Fasten off and repeat on the other side. It gives the skirt a clean, firm border.
Finishing: Starching and Blocking
This is where the angel stops being limp lace and starts looking like an ornament, so don’t skip it.
- Weave in all ends and trim them close.
- Soak the angel in fabric stiffener (or a mix of white school glue and warm water, roughly 1:1) for a couple of minutes. I use the glue mix.
- Squeeze out the extra gently. Don’t wring it.
- Lay it on plastic wrap over a foam board. Pin out the wing tips, the skirt points and each hem scallop. Then open up the ch-2 spaces with the tip of a pin.
- Let it dry completely, at least overnight. It dries rock hard.
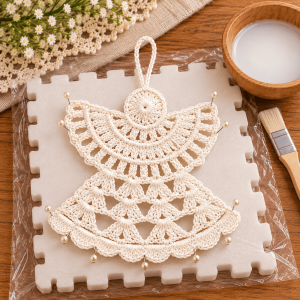
Two things I learned: First, too much glue leaves a yellowish film, so keep it diluted. Second, pin the loop upright so it dries standing. Mine once dried flat, and the loop never stood up again.
A Few Ways to Switch It Up
- Bigger angel: Use size 3 thread and a 2.25 mm hook. The same stitch counts will give you an angel about 7 in wide that works well as a tree topper.
- Gift-tag version: Skip the hanging loop and sew a tiny ribbon through the head. It’s the sweetest thing on a wrapped present.
- Sparkle: Use a thread with a bit of silver or gold metallic. It’s lovely, but starch less so the metallic doesn’t dull.
If you make this angel, I would love to see her. Share a photo in the comments, or tag me if you post it. Every angel comes out a little different, and that’s half the fun. Happy hooking, and don’t be intimidated by the wings. They look harder than they are.