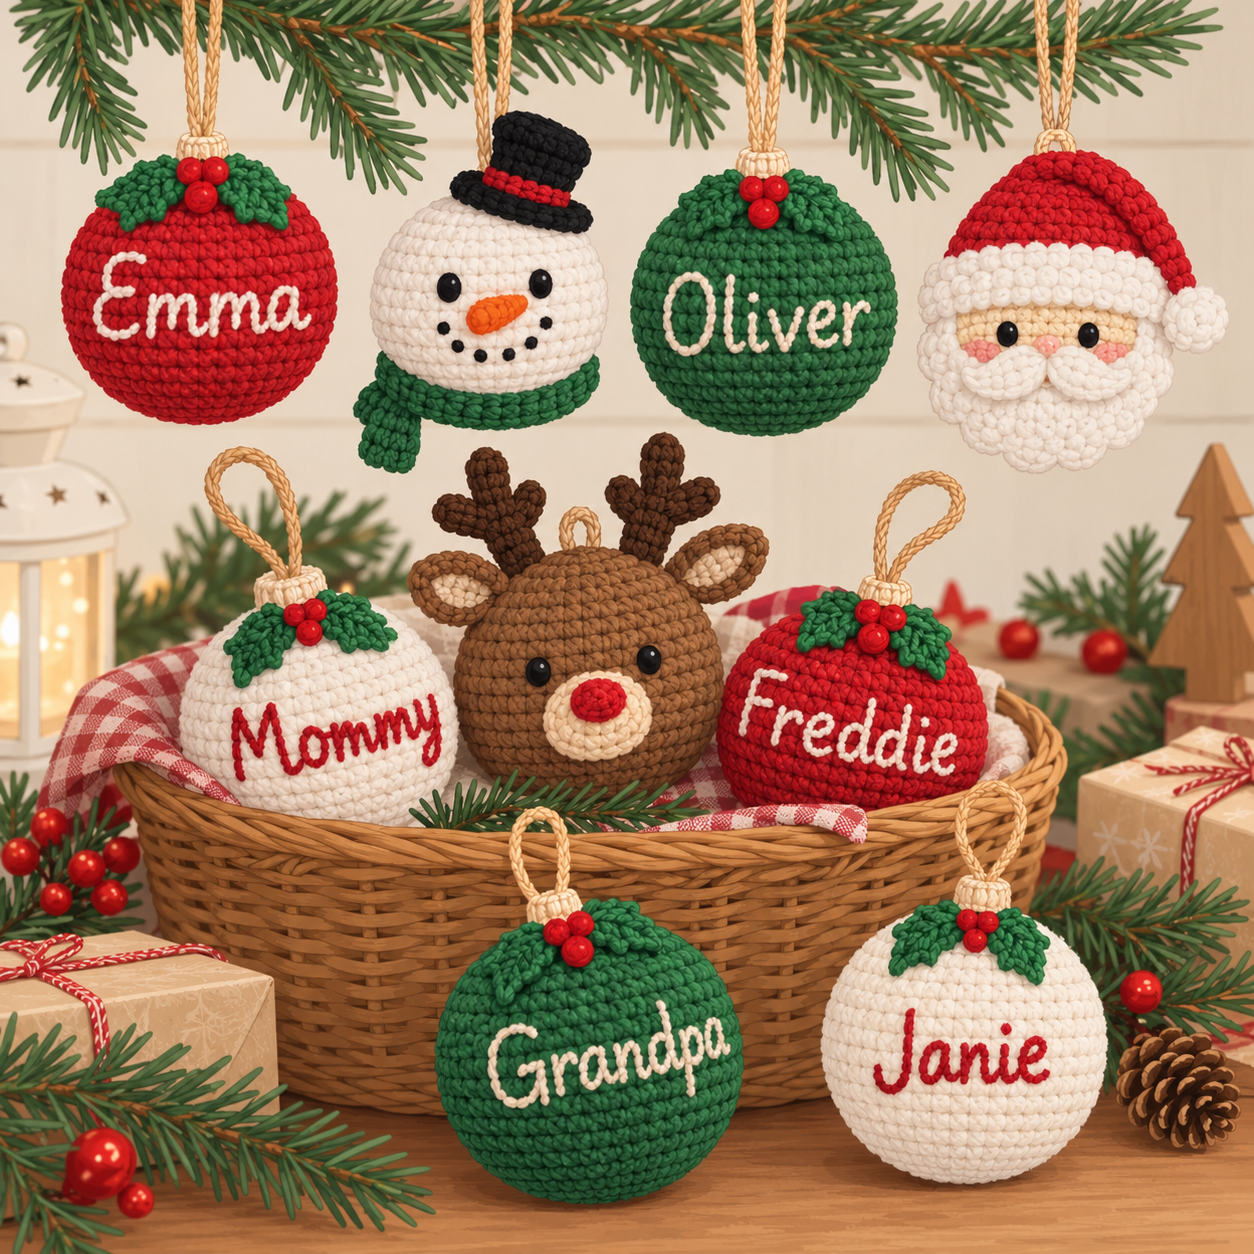
I kept seeing these ornament trees all over Pinterest last month — rows of little crochet balls, each one with a name stitched across the front. Grandpa. Mommy. The family dog. Every version I found either skipped the actual “how” of the lettering or made it sound like you needed calligraphy training to pull it off.
So I sat down and just made a batch myself, mostly to prove to myself it wasn’t as fiddly as it looked. Turns out it isn’t. The ball is a basic amigurumi sphere — nothing new there — and the name goes on with plain backstitch, no fancy stitch required. I ruined exactly one “Freddie” before I figured out the spacing trick I’m sharing below, so hopefully you skip that part entirely.
The base pattern makes one plain ball. From there you can turn it into a name tag, a mini snowman, a reindeer silhouette, or a little Santa face — same body, different five minutes of finishing. Once you’ve made two or three, you’ll want to make one for everyone on your gift list, fair warning.
Finished Size
- Diameter: approximately 2.5 in / 6.5 cm
- With hanging loop: approximately 3.5 in / 9 cm tall
Skill Level
Confident Beginner. You’ll need magic ring, single crochet, basic increase/decrease, and a bit of patience with a tapestry needle. No colorwork, no intarsia — the lettering is embroidered on after the ball is done.
Materials
Yarn (Worsted Weight / US 4):
- Color A (Red or Green): ~30 yd / 27 m per ornament — main ball color
- Color B (Cream or White): small amount — for the lettering
- Color C (Leaf Green): small scrap — holly leaf topper
- Color D (Red): tiny scrap — holly berries
Hook: 3.5 mm (slightly smaller than the yarn calls for — keeps stitches tight so stuffing doesn’t peek through)
Notions:
- Polyester fiberfill
- Tapestry needle
- Jute twine or thin ribbon, about 6 in / 15 cm per ornament, for hanging
- Stitch marker
- A straight pin (optional, for sketching letter spacing before you commit)
Gauge
Single crochet, continuous rounds: 5 sts = 1 in / 2.5 cm. Don’t obsess over this — what actually matters is a fabric tight enough that no white fluff shows between stitches. If it does, drop a hook size.
Abbreviations
- ch — chain
- sc — single crochet
- inc — increase (2 sc in same stitch)
- dec — invisible decrease
- MR — magic ring
- st(s) — stitch(es)
- FO — fasten off
All rounds worked continuously (no joining) unless noted. Mark the first stitch of each round and move the marker up as you go.
The Ornament Ball
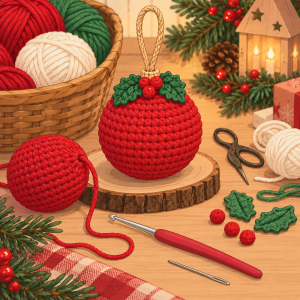
With Color A:
- Rnd 1: 6 sc in MR (6)
- Rnd 2: inc around (12)
- Rnd 3: (sc 1, inc) x6 (18)
- Rnd 4: (sc 2, inc) x6 (24)
- Rnd 5: (sc 3, inc) x6 (30)
- Rnds 6–8: sc around, 3 rounds even (30)
- Rnd 9: (sc 3, dec) x6 (24)
- Rnd 10: (sc 2, dec) x6 (18)
Stuff firmly now, before the opening gets too small to reach into.
- Rnd 11: (sc 1, dec) x6 (12)
- Rnd 12: dec around (6)
FO, leaving a long tail. Thread through remaining 6 sts, pull closed — but before you weave in the end completely, fold your jute twine in half and tack the loop into that closed top with a couple of stitches. That’s your hanger sorted before you move on.
Adding the Name
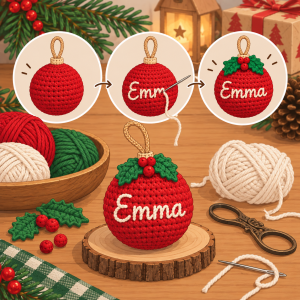
This is the whole point of the project, so take it slow the first time.
- Thread your tapestry needle with Color B.
- Find the widest “equator” round of the ball — that’s your writing line.
- For names up to six letters, just start stitching from the left in simple backstitch, letter by letter, keeping stitches small and close together.
- For longer names, pin the yarn loosely across the ball first to estimate spacing before you commit any stitches. It’s much easier to shift a pin than unpick backstitch.
- Knot off on the inside — dip your needle back through the stuffing and trim close so no tail shows.
Short names and pet names (“Fluffy,” “Janie”) are the easiest starting point if this is your first time hand-lettering yarn. Save the longer names for once you’ve got a rhythm going.
Holly Leaf Topper
With Color C, ch 5.
- Row 1: sl st in 2nd ch from hook, sl st in next 2 chs, 3 sl st in last ch, sl st in next 2 chs along the other side.
FO, leaving a tail for sewing. Make two per ornament.
With Color D, make 2–3 small French knots to sit between the leaves like berries, then sew the whole cluster onto the ornament right where the hanging loop comes out.
Character Variations
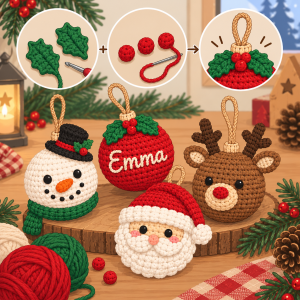
Once the plain ball and lettering feel easy, these small swaps turn a few balls into little characters:
Snowman: Use white for the whole ball. Skip the name — instead, stitch two small black dots for eyes, a tiny orange triangle nose, and tie a small red bow at the top instead of the holly leaf.
Reindeer: On a red or tan ball, stitch a simple antler silhouette in beige, off to one side rather than centered — it reads more like a playful icon than a full face.
Snowflake: White yarn on a red ball, six straight stitches radiating out from a center point. Don’t worry about making it perfectly symmetrical — a little wobble is part of the handmade charm.
Santa: White for the bottom third of the ball (his beard line, stitched as a simple curved backstitch border), two black dots for eyes, a small pink circle nose.
Assembly
- Make sure your hanging loop is secure before you attach anything else — it’s much harder to reinforce once the holly and lettering are in place.
- Center the name (or face details) on the widest part of the ball, roughly opposite the hanging loop’s seam.
- Attach the holly leaf cluster last, right at the base of the loop, so it sits like a little bow at the top.
- Weave in every tail through the stuffing rather than just at the surface — these get handled a lot once they’re on a tree.
A Few Ways to Switch It Up
Making a full family set? Batch all your plain balls first, then do every embroidery step in one sitting. Switching back and forth between crocheting and lettering slows you down more than you’d think.
Want a mini version for gift tags? Stop increasing one round earlier for a ball about 4.5 cm across — plenty of room for a short name or initials.
No embroidery confidence yet? A fine-tip fabric marker works as a placeholder while you build your stitching hand, or swap the name for a single embroidered initial.
Different color story? Cream and gold balls with the name stitched in red gives a completely different, more neutral look for anyone who wants to skip the classic red-and-green.
If you make a set of these, I’d genuinely love to see them — everyone’s lettering comes out a little different, and that’s honestly the best part. Happy hooking, and don’t let the letters intimidate you — they’re far more forgiving than they look on the tree.