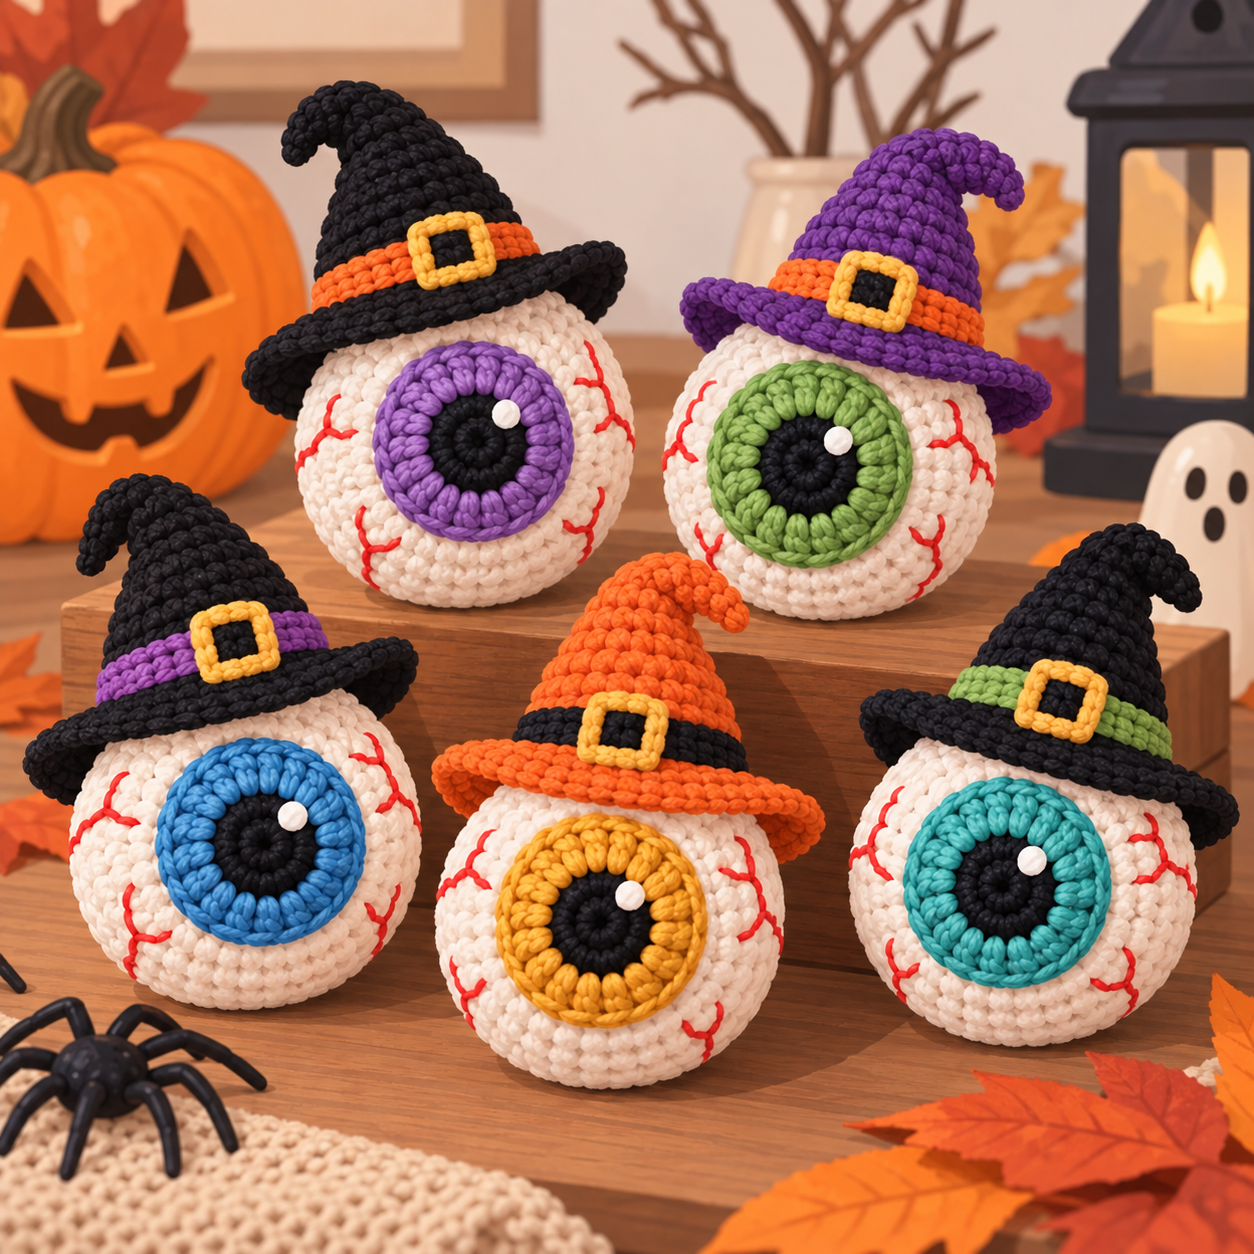
I made my first batch of crochet eyeballs the same way everyone else does — pupil, then iris, then white, all worked in one continuous round with color changes. They came out fine, but every single one had that little diagonal “jog” where the colors meet, because that’s just what happens when you spiral instead of join. I kept fighting it with invisible finishes and fussy joins and eventually got tired of it.
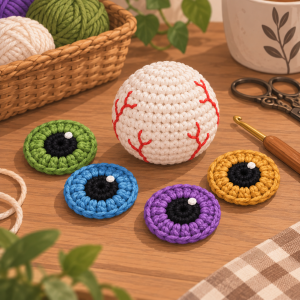
So I flipped the construction around. Instead of building the eye in layered colors, I crochet a plain white sphere and a separate flat iris disc, then stitch the disc on top like a button. No jogging to fix, no fiddly color switches mid-round, and as a bonus you can crochet a small stash of different-colored irises and swap them onto the same sphere depending on your mood — handy if you’re making a whole bowl of these for Halloween and want variety without starting from scratch each time.
It’s a tiny project, uses barely any yarn, and works great as an ornament, a garland piece, or clipped into a Halloween treat bowl.
Finished Size
- Diameter: approximately 2 in / 5 cm
- Circumference: approximately 5.5 in / 14 cm
Skill Level
Beginner. You just need magic ring, single crochet, basic increases, and an invisible decrease. Everything is worked flat or in simple continuous rounds — no color changes mid-round required.
Materials
Yarn (Worsted Weight / US 4):
- Color A (White): ~12 yd / 11 m — the eyeball itself
- Color B (iris color of choice): ~1 yd / 1 m per iris disc
- Color C (Black): ~0.5 yd / 0.5 m — pupil disc
Hook: US E-4 / 3.5 mm
Notions:
- Stitch marker
- Polyester fiberfill
- Yarn needle
- Small stuffing tool (a chopstick or dowel works well for a piece this size)
- Red embroidery floss + needle, optional, for veins
Gauge
With Color A in continuous single crochet: the first 4 rounds should measure about 1.5 in / 4 cm across. Amigurumi gauge is forgiving — what matters more is a tight enough fabric that stuffing doesn’t peek through.
Abbreviations
- MR — magic ring
- sc — single crochet
- inc — increase (2 sc in same stitch)
- dec — invisible decrease
- st(s) — stitch(es)
- FO — fasten off
- ( ) — repeat instructions the stated number of times
- — total stitch count at end of round
All rounds are worked continuously unless noted — place a stitch marker in the first stitch and move it up each round.
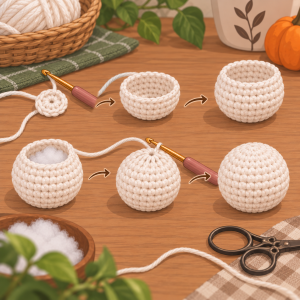
The Sphere (Color A)
- Rnd 1: 6 sc in MR [6]
- Rnd 2: inc around [12]
- Rnd 3: (sc 1, inc) x6 [18]
- Rnd 4: (sc 2, inc) x6 [24]
- Rnd 5: (sc 3, inc) x6 [30]
- Rnds 6–10: sc around, 5 rounds even [30]
- Rnd 11: (sc 3, dec) x6 [24]
- Rnd 12: (sc 2, dec) x6 [18]
Begin stuffing here — firm but not overpacked, since the disc-and-appliqué finish looks best on a smooth, evenly rounded surface.
- Rnd 13: (sc 1, dec) x6 [12]
- Rnd 14: dec around [6]
FO, leaving a long tail. Weave through remaining 6 stitches, pull closed, and secure. Set aside — this is your finished eyeball base, ready for any iris you like.
The Iris Disc (Color B) — make 1 per eye
Worked flat, like a tiny coaster, no fastening off between rounds needed until the end:
- Rnd 1: 6 sc in MR [6]
- Rnd 2: inc around [12]
- Rnd 3: (sc 1, inc) x6 [18]
FO, leaving a 6 in / 15 cm tail for sewing. Don’t stuff — it should lie flat.
This is the piece to make in bulk if you want variety. A little scrap of gold, teal, hot pink, whatever — each disc takes less than a yard, so it’s a great scrap-buster.
The Pupil Disc (Color C)
- Rnd 1: 6 sc in MR [6]
- Rnd 2: inc around [12]
FO, leaving a 6 in / 15 cm tail for sewing.
Assembly
- Center the pupil disc on top of the iris disc and whipstitch it in place around the edge, using the pupil’s tail.
- Position the assembled iris wherever you’d like the eye to “look” on the white sphere — slightly off-center tends to look more alive than dead-center.
- Pin it down first if you’re not confident, then whipstitch around the entire outer edge of the iris disc, catching just the front loops of the sphere so the stitching stays hidden in the texture.
- Weave in all your ends.
That’s it — no color jog to fuss over, because there was never a color change mid-round to begin with.
Adding Veins (Optional)
Thread red embroidery floss and stitch a few short, slightly crooked lines radiating out from underneath the iris toward the back of the eye — think tree branches or a cracked windshield rather than perfectly straight lines. Two or three strands of floss gives a fine, subtle vein; use more strands for something bolder.
Optional: A Tiny Witch Hat
Because really, what’s an eyeball without a little Halloween outfit? This works as a snug, worked-in-the-round cone — no separate brim piece to fuss with sewing on straight.
Materials for the hat:
- Color E (hat color, e.g. Charcoal): ~3 yd / 3 m
- Color F (small contrast, for the band): ~1 yd / 1 m, optional
With Color E:
- Rnd 1: 6 sc in MR [6]
- Rnd 2: inc around [12]
- Rnd 3: (sc 1, inc) x6 [18]
This flared bottom becomes your brim. Fasten off here if you’d like a shorter, stubbier hat, or continue for a taller point.
- Rnd 4: sc around [18]
- Rnd 5: (sc 1, dec) x6 [12]
- Rnd 6: sc around [12]
- Rnd 7: dec around [6]
- Rnd 8: sc around [6]
FO, leaving a long tail. Stuff the tip very lightly (just enough that it doesn’t collapse flat) or leave it unstuffed for a floppier point — both look good.
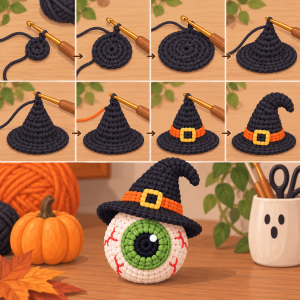
Optional band: join Color F at the base with a slip stitch and work 1 round of sc evenly around Rnd 3, then FO and weave in.
Attaching it: the hat can either be tacked on permanently with a few stitches at the brim, or left removable — just perch it on top and let the brim’s curve hold it in place, the way a lot of amigurumi toppers work. Removable is nice if you’re using the same eyeball body for different occasions.
A Few Ways to Switch It Up
Want interchangeable eyes? Instead of sewing the iris on permanently, tack on a small hook-and-loop dot or a snap between the disc and the sphere so you can swap colors on the fly.
Turning it into an ornament or keychain? Thread a loop of yarn or ribbon through the top before you close up Rnd 14, knot the ends, and tuck the knot inside as you finish stuffing.
Making a whole bowl of them? Batch out a dozen plain white spheres first, then sit down with your scrap yarn and crank out iris discs in every color you’ve got — it goes fast once you’re not stopping to switch colors mid-round.
If you make a set, I’d love to see how the color combos turn out — everyone always goes in a slightly different direction with the iris shades. Happy hooking!