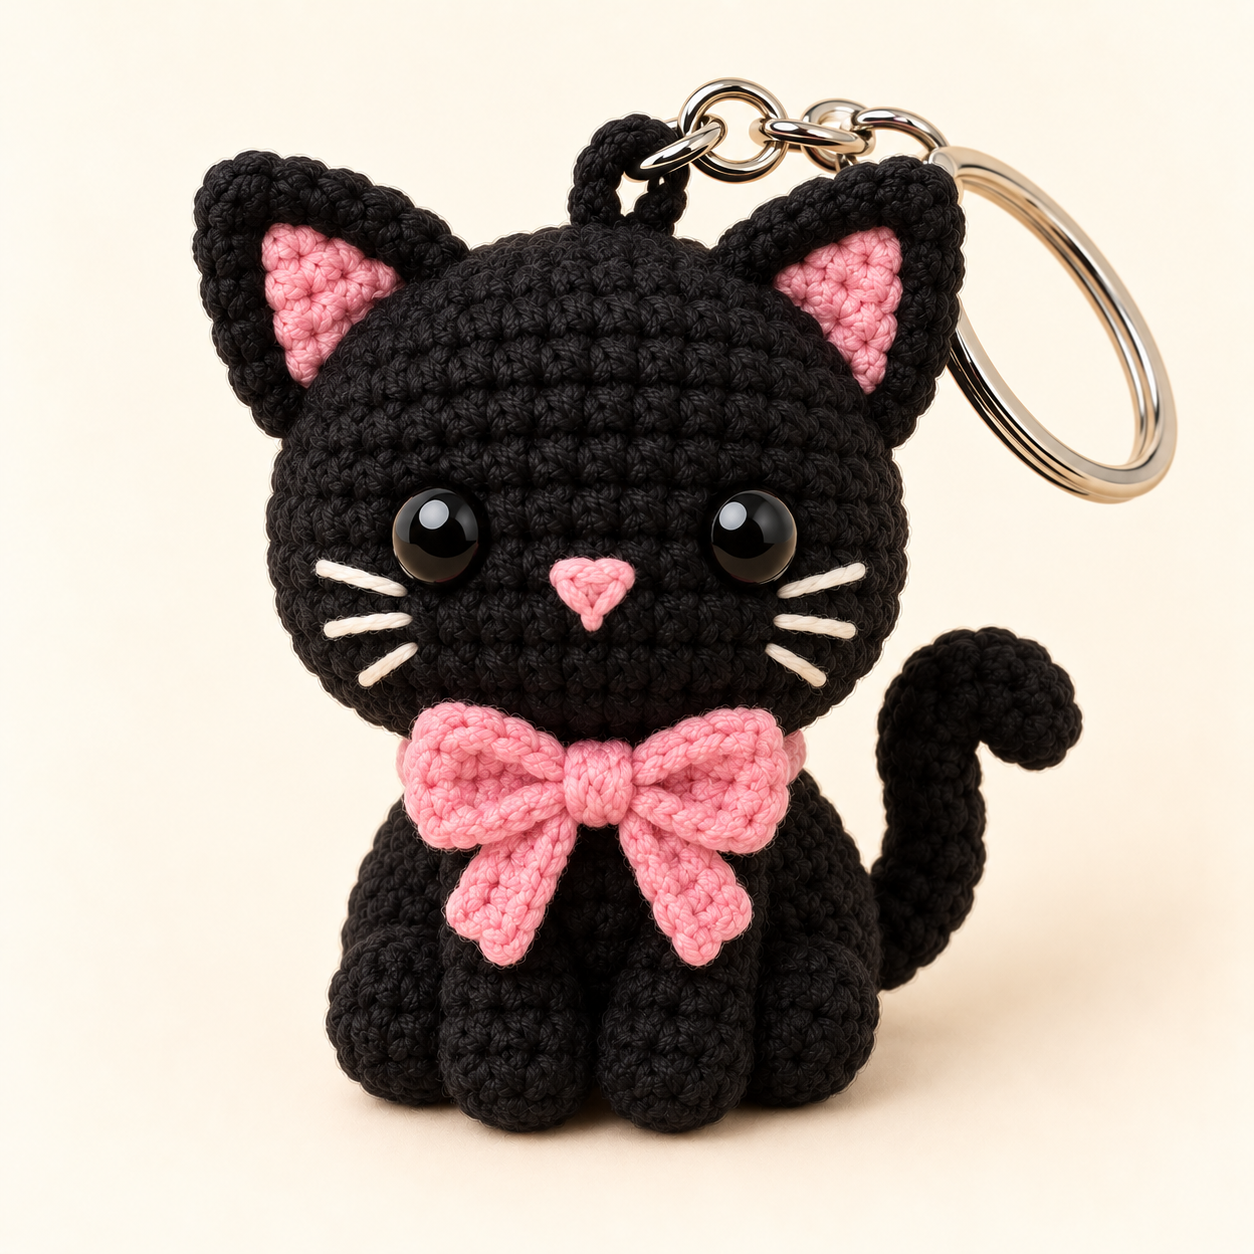
I made this little cat on a lazy Sunday because I had half a skein of black cotton yarn and a bag zipper that needed some personality. My first attempt was a disaster. The head was too small for the body, and the ears looked like shark fins. By the third try I had it figured out, so here’s exactly what worked.
The finished cat is about 9 cm (3.5 in) tall and took me around three hours. If you can make a magic ring and single crochet in the round, you can make this one.
What You’ll Need
- Black worsted weight yarn (I used cotton, but acrylic works too)
- Scrap of pink yarn for the nose and bow
- Scrap of white yarn for the whiskers
- 2 safety eyes, 8 mm
- 2.5 mm hook
- Fiberfill
- Yarn needle, scissors, stitch marker
- Keychain ring with chain
A 2.5 mm hook looks tiny for worsted yarn, but that’s intentional. Tight stitches keep the stuffing from showing through, and that’s especially noticeable on black.
Abbreviations (US Terms)
MR = magic ring, sc = single crochet, inc = 2 sc in one stitch, dec = single crochet two together, sl st = slip stitch, ch = chain, hdc = half double crochet, dc = double crochet.
Everything is worked in a spiral, so don’t join your rounds. Mark the first stitch of each round. Numbers in parentheses are your stitch count.
Head
- R1: 6 sc in MR (6)
- R2: inc x 6 (12)
- R3: (1 sc, inc) x 6 (18)
- R4: (2 sc, inc) x 6 (24)
- R5: (3 sc, inc) x 6 (30)
- R6–11: sc around (30)
Push the safety eyes in between rounds 7 and 8, about 5 stitches apart. Before locking the washers, look at the face from a few angles. I once put one eye a row higher than the other and had to redo it, which is not fun once the washer is on.
- R12: (3 sc, dec) x 6 (24)
- R13: (2 sc, dec) x 6 (18)
Stuff the head now, firmly. It’s much harder once the hole gets small.
- R14: (1 sc, dec) x 6 (12)
- R15: dec x 6 (6)
Fasten off, close the hole, and weave in the end.
Body
- R1: 6 sc in MR (6)
- R2: inc x 6 (12)
- R3: (1 sc, inc) x 6 (18)
- R4: (2 sc, inc) x 6 (24)
- R5–7: sc around (24)
- R8: (2 sc, dec) x 6 (18)
- R9: (1 sc, dec) x 6 (12)
Stuff until it feels firm. R10: dec x 6 (6). Fasten off and close the hole.
Ears (Make 2)
- R1: 4 sc in MR (4)
- R2: inc x 4 (8)
- R3: (1 sc, inc) x 4 (12)
- R4–5: sc around (12)
Flatten the piece and sc across the top through both layers (6 sc). Fasten off with a long tail. Don’t stuff the ears. My first pair was stuffed, and that’s exactly why they looked like shark fins.
Tail
Ch 9. Starting in the 2nd chain from the hook, sc in each chain across (8). Fasten off with a long tail. This gives a flat little tail. If you prefer a rounder one, work 4 sc in a magic ring and then sc around for 8 rounds, adding a pinch of stuffing.
Bow
Ch 11. Work (sc, hdc, dc, hdc, sc) in the 2nd chain from the hook, sl st in the next chain, then work (sc, hdc, dc, hdc, sc) in the next chain. Fasten off and leave a tail. Pinch the center and wrap the tail around it a few times to create the bow shape, then knot at the back.
Bows are fiddly to get even. I made three before I had one I liked, so don’t be discouraged if your first looks a little wonky.
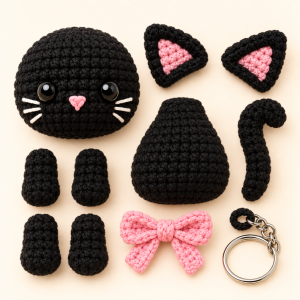
Assembly
- Ears: pin them on top of the head, angled slightly outward, with 3–4 stitches between them. Check from the front and the side before sewing.
- Nose: embroider a small triangle with pink yarn, just below and between the eyes. Smaller looks cuter.
- Whiskers: three short white stitches on each side. Pull gently so they lie flat.
- Head to body: whip stitch all around with black yarn. Tilt the face up slightly for a sweeter look.
- Tail: sew it low on the back so it curves upward.
- Bow: sew it to the neck, hiding the seam between head and body.
- Keychain: pull a short yarn loop through the top of the head, thread on the ring, and knot it securely.
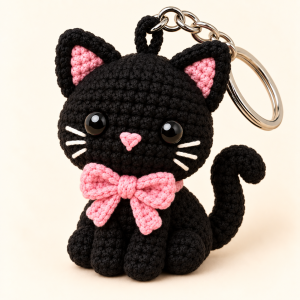
Things I Learned the Hard Way
Black yarn is difficult to see, so work in daylight or under a bright lamp. Count your stitches at the end of every round. It takes ten seconds and saves you from unraveling later. I also switched to cotton yarn partway through because the acrylic I started with kept splitting, and cotton gave me much cleaner stitches.
Quick Questions
Can I use a different yarn? Yes. Just go down a hook size or two from what the label suggests so the fabric stays dense. The cat will be bigger or smaller, and you may want different eye sizes.
Is it safe for kids? Not with safety eyes. For babies and toddlers, embroider the eyes instead.
Other colors? The pattern works for any color. Change the bow to match the season.
Happy crocheting! If you make one, leave a comment below and tell me how yours turned out. I’d love to see it.