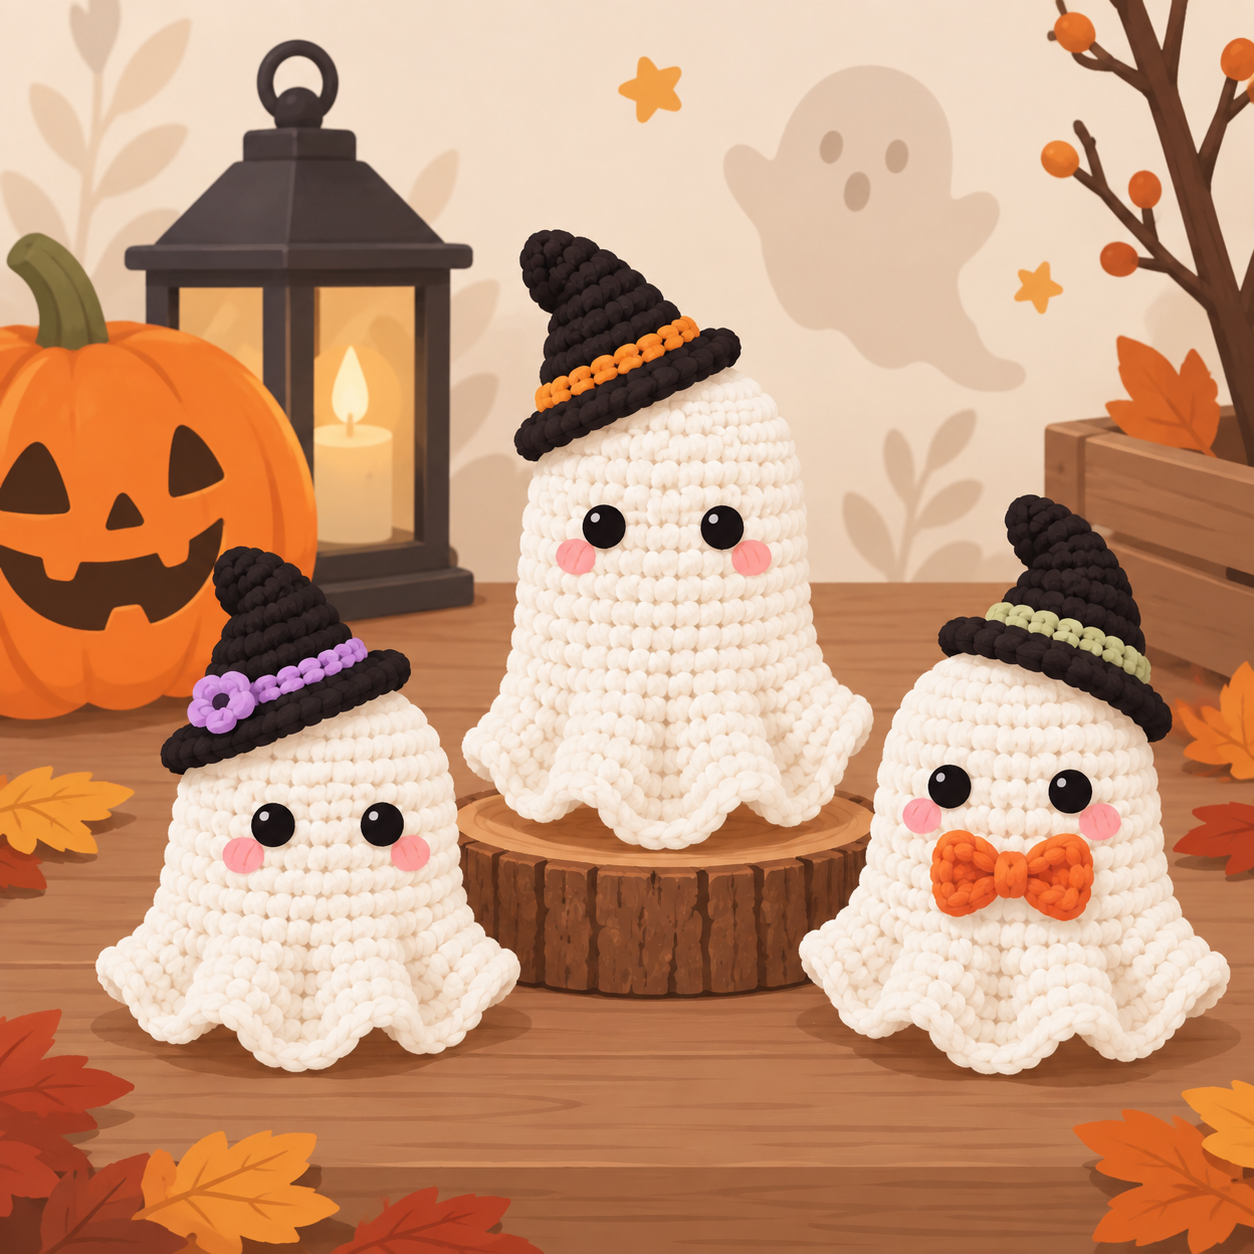
Okay, confession: I almost didn’t make ghosts this year. Every pattern I found wanted stuffing, floral wire bent into a “flowy” hem, or a hot glue gun standing by. That’s a lot of commitment for something that’s basically a Tuesday-night decoration.
Then I remembered the trick my grandmother used for the little acorn caps she used to crochet — you don’t need wire to make something look like it’s mid-flutter, you just need to pinch it in the right spots after it comes off the hook. So that’s what I did here. No stuffing, no wire, no glue unless you want it. Just yarn, a hook, and your fingers doing the shaping at the end.
I also couldn’t stop at one size. Once the base shape clicked, I kept adjusting the round count to see what else I could get out of it — a short chubby one, a tall slim one, and a medium one that splits the difference. Same technique for all three, just different proportions, so once you’ve made one, the other two take almost no extra thinking.
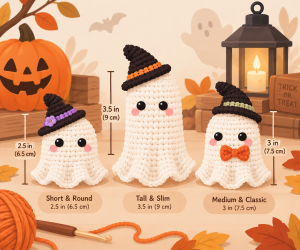
Finished Size
- Short & Round: approximately 2.5 in / 6.5 cm tall
- Tall & Slim: approximately 3.5 in / 9 cm tall
- Medium & Classic: approximately 3 in / 7.5 cm tall
- (Measurements don’t include the hat or bow)
Skill Level
Easy — genuinely beginner-friendly. If you can do a magic ring, single crochet, and a basic increase, you have everything you need. There’s no decreasing, no stuffing, and the only sewing is attaching eyes and (if you want them) accessories.
Materials
Yarn (Worsted Weight / US 4):
- Color A — White or Antique White: ~40 yd / 36 m, makes all three ghost bodies
- Color B — Charcoal or Black: ~10 yd / 9 m, for the witch hat
- Color C — any accent shade: ~5 yd / 4.5 m, for the bow
Hook: 3.5–4.0 mm (US E-4 to G-6). Go smaller rather than bigger — a tighter fabric holds the pinched shape much better than a loose one.
Notions:
- 6mm safety eyes (or black embroidery thread if you’d rather stitch the eyes on)
- Yarn needle
- Scissors
- Fiberfill: none needed — that’s the whole point
Gauge
Honestly, gauge barely matters here since nothing needs to fit anything else. The one thing I’d actually pay attention to is fabric tightness — if you can see gaps between your stitches, drop down half a hook size. Loose stitches make the ghost sag instead of holding that nice pinched wave.
Abbreviations
- MR — magic ring
- sc — single crochet
- inc — increase (2 sc worked into the same stitch)
- sl st — slip stitch
- st(s) — stitch(es)
- FO — fasten off
Everything below is worked in a continuous spiral — no joining, no chaining up between rounds. Drop a stitch marker into the first stitch of each round and just keep bumping it up as you go, or you will lose count. Ask me how I know.
Ghost #1 — Short & Round
This is the fastest of the three and a good one to practice on first since there’s barely any counting involved.
With Color A:
- Rnd 1: 6 sc in MR (6)
- Rnd 2: inc around (12)
- Rnd 3: (sc 1, inc) x6 (18)
- Rnd 4: (sc 2, inc) x6 (24)
- Rnds 5–7: sc around, plain, 3 rounds (24)
- Rnd 8: (sc 3, inc) x6 (30)
- Rnd 9: (sc 4, inc) x6 (36)
- Rnds 10–11: sc around, plain, 2 rounds (36)
- Rnd 12: sc 2, sl st into next 2 sts, FO.
Pop the safety eyes in between Rounds 3 and 4, roughly 3 stitches apart — do this before you finish the last few rounds, while there’s still enough room inside to reach the backs on.
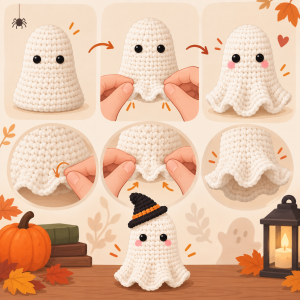
Weave in your ends, then pinch inward along each increase line. That’s the whole trick — it turns a plain cone into something that looks like it’s floating.
Ghost #2 — Tall & Slim
Same start as Ghost #1, but we hold off on the second increase section much longer, which stretches the body upward instead of outward.
With Color A:
- Rnd 1: 6 sc in MR (6)
- Rnd 2: inc around (12)
- Rnd 3: (sc 1, inc) x6 (18)
- Rnd 4: (sc 2, inc) x6 (24)
- Rnds 5–12: sc around, plain, 8 rounds (24) — this stretch is what gives you the height
- Rnd 13: (sc 3, inc) x6 (30)
- Rnd 14: (sc 4, inc) x6 (36)
- Rnd 15: (sc 5, inc) x6 (42)
- Rnd 16: sc 2, sl st into next 2 sts, FO.
Because the body’s longer here, place the eyes a bit lower — between Rounds 6 and 7.
Weave in ends, pinch the increase lines the same as before.
Ghost #3 — Medium & Classic
Right in between the other two — this is the shape most people picture when someone says “cute cartoon ghost.”
With Color A:
- Rnd 1: 6 sc in MR (6)
- Rnd 2: inc around (12)
- Rnd 3: (sc 1, inc) x6 (18)
- Rnd 4: (sc 2, inc) x6 (24)
- Rnds 5–9: sc around, plain, 5 rounds (24)
- Rnd 10: (sc 4, inc) x6 (30)
- Rnd 11: (sc 5, inc) x6 (36)
- Rnd 12: (sc 6, inc) x6 (42)
- Rnd 13: sc 2, sl st into next 2 sts, FO.
Eyes go between Rounds 5 and 6.
Weave in, pinch as usual.
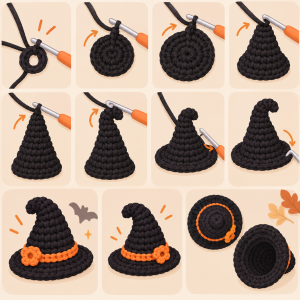
Optional: Tiny Witch Hat
With Color B:
- Rnd 1: 4 sc in MR (4)
- Rnd 2: inc around (8)
- Rnd 3: (sc 1, inc) x4 (12)
- Rnd 4: (sc 2, inc) x4 (16)
- Rnd 5: (sc 3, inc) x4 (20)
- Rnd 6: (sc 4, inc) x4 (24)
- Rnd 7: sc around, plain (24)
- Rnd 8: (sc 1, inc) around — this round is your brim (36)
- Rnd 9: sc 2, sl st into next 2 sts, FO.
My first attempt at this hat had a rounded, mushroom-y tip instead of a sharp point, which bugged me way more than it should have. Fix: before you weave in the end, push the blunt end of your hook (or a pencil) up into the tip from the inside. It pops the top stitches outward into an actual point. No need to glue the hat down — it can just perch on top.
Optional: Little Bow
With Color C, into a magic ring: ch 4, 3 dc, ch 4, sl st to close. Do that exact sequence one more time into the same ring — ch 4, 3 dc, ch 4, sl st to close — then FO, leaving a long tail.
Pull the tail through the center of the ring and cinch it down tight, which pinches the two loops together into a bow shape. Take your beginning tail and your ending tail, cross them around the center in opposite directions like you’re tying a ribbon on a gift, and knot. Use those same tails to sew the bow onto a ghost’s head — off to one side rather than dead-center looks more natural, in my opinion.
Assembly
![Placeholder: photo of the three finished ghosts lined up together]
- Shape before you accessorize. Pinch every increase column on the body first — it’s much easier to do this while there’s no hat or bow in the way.
- Eyes should already be set from the earlier steps; if you missed the window, you can still push safety-eye posts through afterward, just go slowly so you don’t distort the stitches.
- Hats rest on top as-is — a couple of tacking stitches or a dot of glue if you want them to stay put for good.
- Bows get sewn or glued on, with the tails tied off and tucked inside where they won’t show.
- One last gentle squeeze along the hem of each ghost to settle the pinched shape, and you’re done.
A Few Ways to Switch It Up
Want them bigger? Bump up to a bulky or super bulky yarn with a 6mm+ hook, keep the exact same round counts, and everything scales up proportionally.
Want them to glow in the dark? Since there’s no stuffing weighing the yarn down or muting the color, glow-in-the-dark yarn shows up really well on these — works better here than on a stuffed amigurumi, honestly.
Want a whole Halloween lineup? The same short/tall/medium body structure adapts to pumpkins, bats, or cats — just swap the color and skip the pinching step for a smoother, rounder finish.
Making a garland instead? Skip the hats and bows, tack a loop of thread to the top of each ghost, and string them along a length of twine for a quick no-fuss mantel piece.
If you end up making a set, I’d genuinely love to see them. Everybody’s pinch marks land a little differently, which is my favorite part — no two ghosts turn out exactly alike. Happy haunting, and happy hooking!