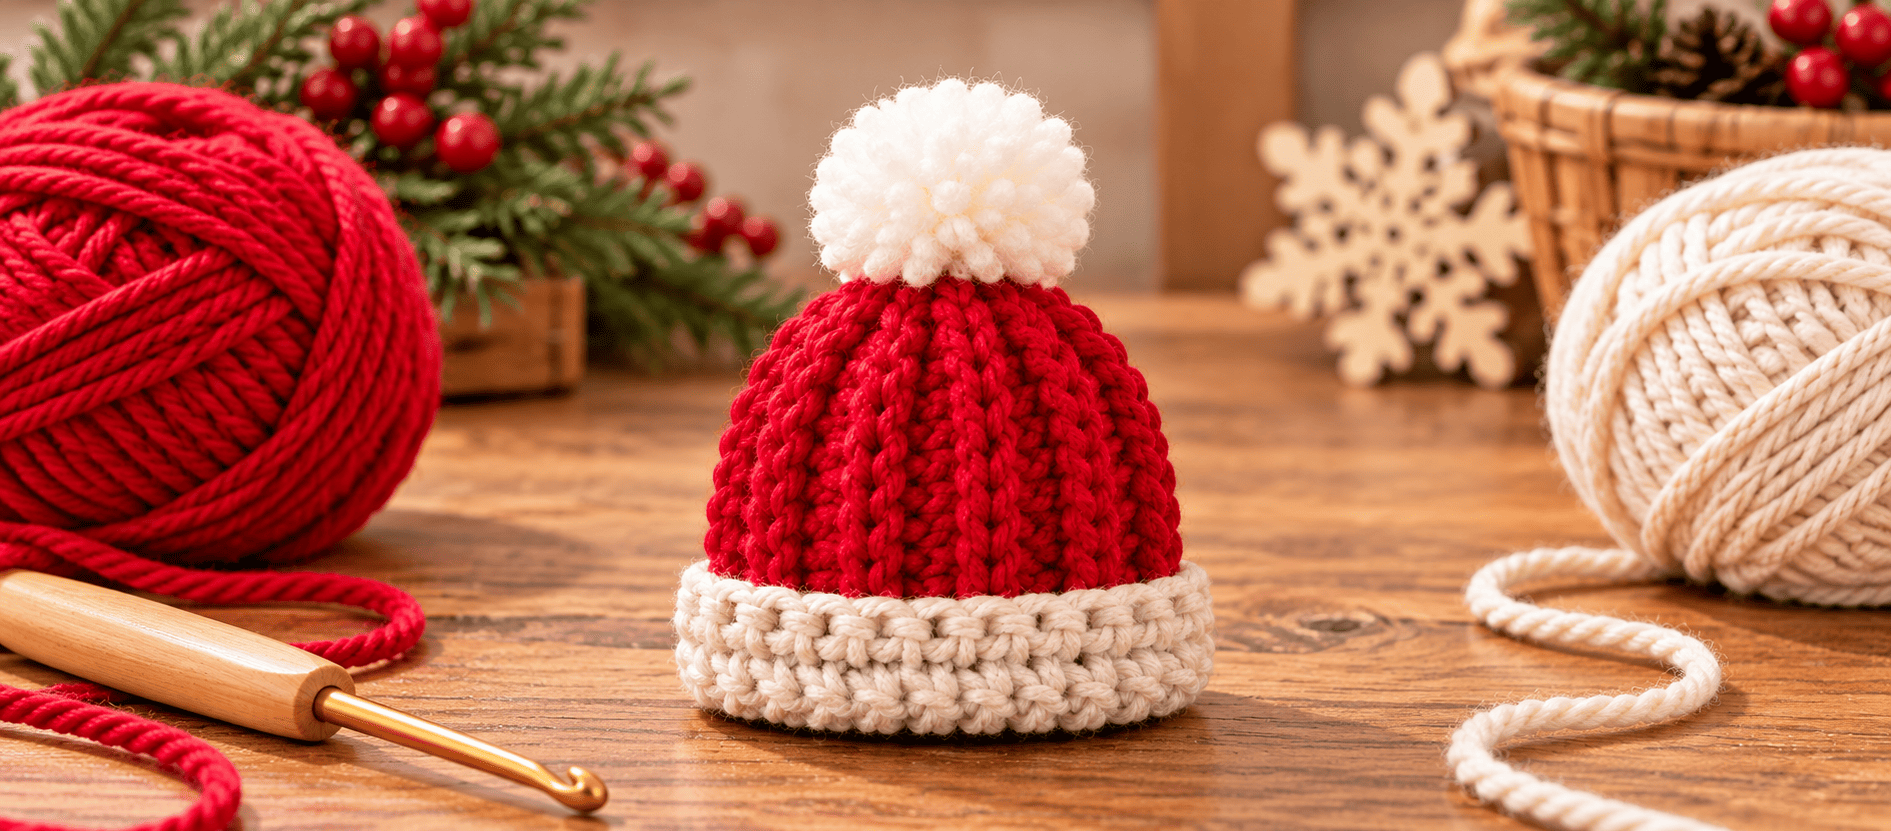
The first time I tried to make a tiny crochet hat, I did what every pattern told me to do: start at the top with a magic ring and work in rounds. It was fine. It was also round, smooth and a bit boring, and nothing like the chunky little ribbed beanies I kept admiring on other people’s trees.
Then I turned the whole thing sideways. This mini beanie is worked as a flat strip in back loops only, which gives you those crisp vertical ribs from the crown down to the brim. The brim comes afterwards, worked straight onto the bottom edge, so it has its own cozy, squishy texture. No increases, no decreases, no counting rounds. If you can chain and single crochet, you can make this.
I made mine in dusty sage green with a blush pink brim and a fluffy ivory pom-pom. It looks soft and a little vintage, and it goes with everything from a cream tree to a plain brown gift tag.
Finished Size

- Height: about 2.5 in / 6.5 cm (pom-pom not included)
- Width: about 1.75 in / 4.5 cm when lying flat
- Pom-pom: about 1 in / 2.5 cm
It is small enough to hang on a tree, but big enough to slip over a boiled egg, a small bottle stopper or the top of a pencil if you want to use it as a gift topper.
Skill Level
Beginner. You only need chain, single crochet, slip stitch and the ability to work in the back loop only. The ribbed look comes entirely from that one little trick.
Materials
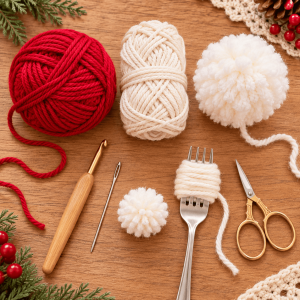
- Color A (Red): about 20 yd / 18 m of worsted weight cotton or acrylic. This is the body of the hat.
- Color B (Cream): about 10 yd / 9 m. This is the brim.
- Color C (White): a small amount for the pom-pom. Fluffy acrylic or a wool blend works best.
- Hook:5 mm (US E-4). I go down a size from the yarn label so the fabric is dense and the hat holds its shape.
- Notions: yarn needle, scissors, a piece of cardboard or a fork for the pom-pom, a small loop of ribbon or thread if you want to hang it.
Gauge
In back-loop single crochet, 10 stitches should measure about 2 in / 5 cm wide, and 26 rows about 5 in / 12.5 cm long. Gauge is not critical on an ornament, but a tight fabric makes better ribs. If your hat looks floppy, drop down a hook size.
Abbreviations
- ch: chain
- sc: single crochet
- BLO: back loop only
- sl st: slip stitch
- RS: right side
- FO: fasten off
Step 1: Crochet the Ribbed Body
With Color A, ch 11.
- Row 1: sc in the 2nd ch from the hook and in each ch across. Ch 1, turn. (10 sc)
- Row 2: sc in the BLO of each stitch across. Ch 1, turn. (10 sc)
- Rows 3-26: repeat Row 2. (10 sc)
Do not fasten off yet. You should have a small rectangle that is about 2 in wide and 5 in long, with ridges running across it. Those ridges will turn into the vertical ribs once the strip becomes a tube.
Personal tip: I count my rows by the little ridges on the right side. After every 5 ridges I tie a loose scrap of yarn to the edge. Losing count at row 17 and having to recount is much more annoying than it sounds on something this small.
Step 2: Close the Tube
Fold the strip so the two short ends meet, with the right side facing out. Sl st through both loops of the last row and the foundation chain together, working across all 10 stitches. FO and leave a tail of about 10 in / 25 cm.
Turn the seam to the back of the hat. Because the seam sits in a ridge, it is almost invisible once the pom-pom goes on.

Step 3: Gather the Crown
Thread the long tail onto your yarn needle. Run it through the edge of every row on the top of the hat, going around the opening (26 loops in total). Pull the tail tight so the top closes into a soft dome, then pass the needle through the center a few times and knot it securely on the inside.
If you leave this tail too short, you will regret it. I always leave more than I think I need.
Tip: pull gradually, a little at a time, and smooth the ribs with your fingers as you cinch. This keeps the stripes lined up like the sections of an umbrella instead of twisting.
Step 4: Add the Brim
The brim is worked into the bottom edge of the hat, which is the edge you started with.
Join Color B with a sl st in the end of any row, close to the seam.
- Round 1: ch 1, sc in the end of each row around (26 sc). Join with a sl st to the first sc. Ch 1, do not turn.
- Round 2: sc in each stitch around (26). Join with a sl st. Ch 1.
- Round 3: sc in each stitch around (26). Join with a sl st.
FO and weave in the end. For a chunkier, more rolled brim, add a fourth round of sc.
The brim looks fluffier if you work it with the same hook size and a slightly loose tension. If it seems tight and pulls the hat inwards, go up half a hook size for these three rounds only.
Step 5: Make the Pom-Pom
Wrap Color C around two fingers (or a fork) about 40 times. Slide the loops off, tie them tightly in the middle with a separate strand, then cut the loops and trim into a neat ball of about 1 in / 2.5 cm.
Use the ties to attach the pom-pom to the center of the crown. Knot it inside the hat so it cannot pull out.
A small tip I learned the hard way: tie the center strand with a double knot, then trim the pom-pom only after it is on the hat. It is much easier to shape in place.
Optional: Make It an Ornament
Attach a small loop of ribbon, twine or thread to the inside of the hat, near the crown, and knot it. Hang the hat from a tree branch, a gift or a window latch.
Why I Don’t Work This One in the Round
Most mini hat patterns start at the crown and work around. That is perfectly good, but the stitches then lie horizontally and you lose the ribbed look. Working sideways gives you a clean knit-style rib with a plain single crochet stitch, and you can adjust the circumference simply by adding or removing rows.
If you want a larger version, add 2 rows for every 0.4 in / 1 cm you need around the head. For a taller hat, add 1 stitch to the foundation chain for every 0.2 in / 5 mm in height.
Color Ideas
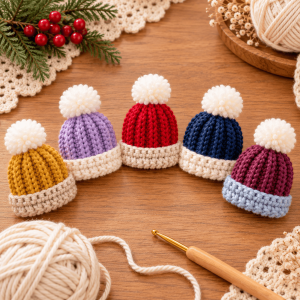
You can swap the colors freely. These are my favorites:
- Sage and blush: the version in this pattern, soft and modern.
- Mustard and oatmeal: warm and cozy, lovely on a natural tree.
- Lavender and ivory: sweet and light, nice for a winter wedding or a baby shower.
- Navy and cream with a gold pom-pom: elegant and a little festive.
- Plum and powder blue: unusual, but very pretty in the right light.
Choose a brim color that is lighter than the body for the best contrast. A white or ivory pom-pom is almost always the safest option.
Troubleshooting
The ribs look uneven. You probably worked some stitches into both loops. Look for a row where the ridge is missing and make sure every stitch goes into the back loop only.
The hat looks too pointy. Gather the crown a little looser, then stitch around the center a few times to flatten it.
The brim curls. Weave in your ends, dampen the brim and let it dry flat. A slightly looser tension on the next one helps.
Final Thoughts
I made my first batch of these in one evening and ended up with a handful of mismatched mini hats. They ended up on gift boxes, a bottle of wine and even a few coffee jars. They are quick, cheap and always a hit, which is exactly the kind of project I love.
If you make one, I would love to see it. Share a photo in the comments or tag me on social media. Happy hooking!