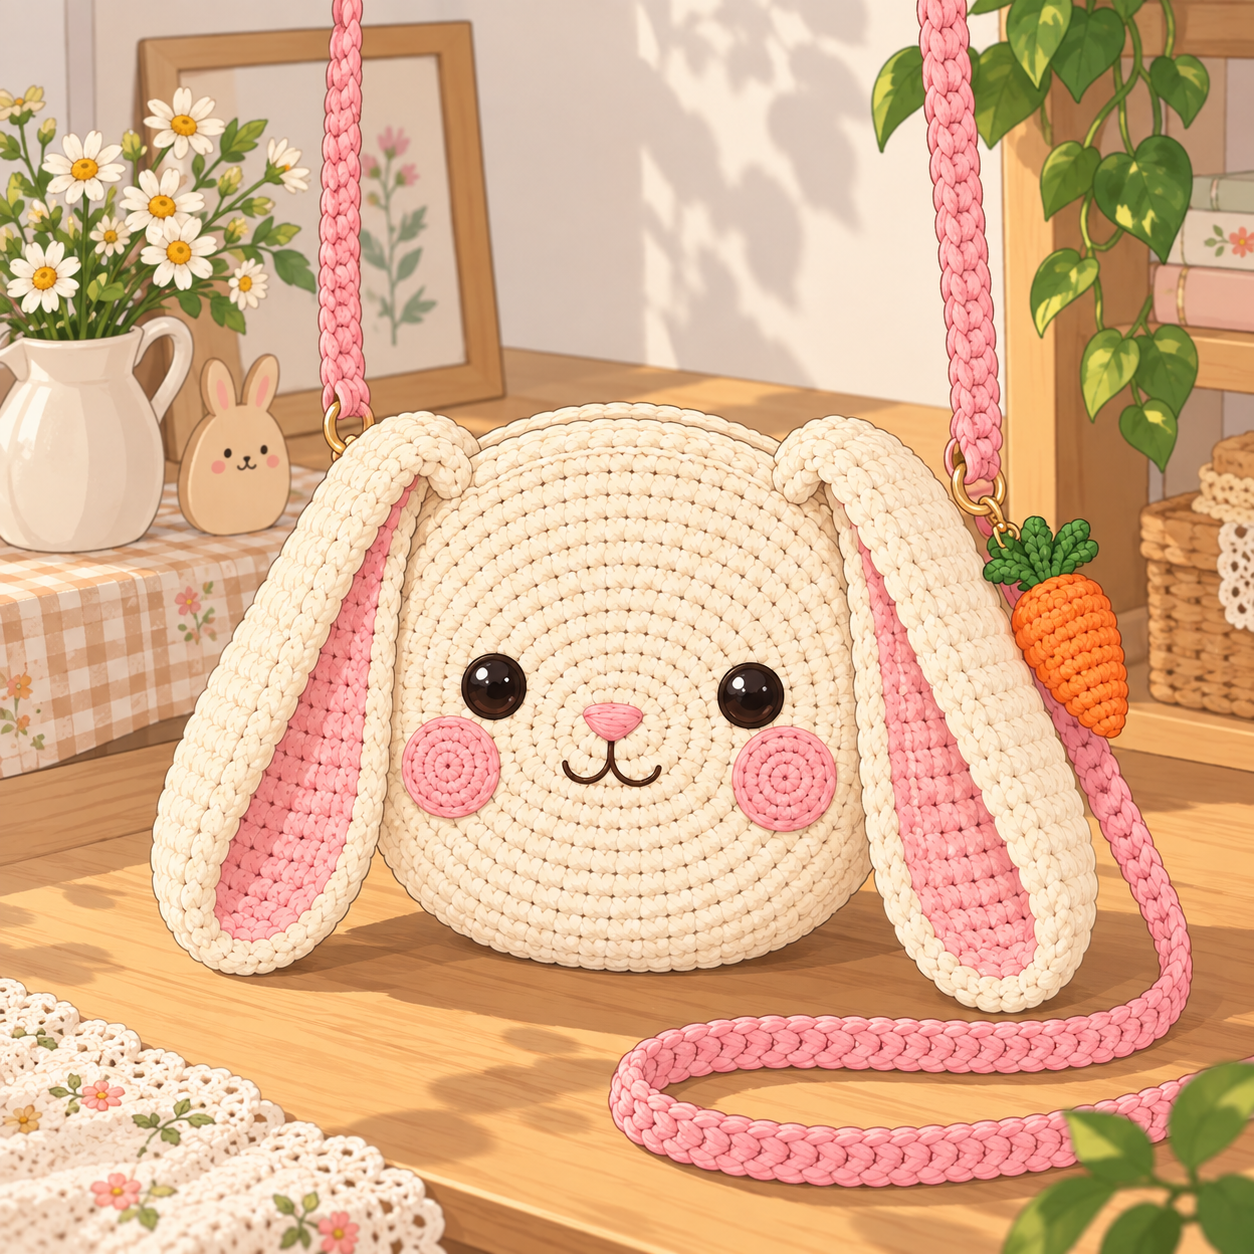
Every crochet bunny bag I came across had the same problem. It looked adorable in the photos, then sagged the moment you put a phone in it. Soft worsted yarn and a loose hook make a floppy bag, and floppy bags don’t hold their shape.
So I made my own version and tackled the structure first. This bunny uses a tighter hook than the yarn label suggests, and it has no zipper and no fabric lining. Its floppy ears hang down over the sides instead of standing up, and there’s a little carrot charm hanging off the strap. It fits a phone, a lip balm, and a few small things, and it holds its shape.
Finished Size
- Bag (without ears): approx. 7 in / 18 cm wide × 7 in / 18 cm tall
- Ears: approx. 4.5 in / 11 cm long
- Strap: approx. 42 in / 107 cm long, which gives about a 20 in / 50 cm drop on the shoulder
- Carrot charm: approx. 2 in / 5 cm
Skill Level
Beginner. You need magic ring, single crochet, increases, decreases, and basic sewing. Both bag panels follow the same simple circle formula, so once you’ve made the first one, the second is just repetition.
Materials
Yarn: worsted weight cotton, or a cotton blend (US 4 / medium)
- Cream (main): approx. 150 yd / 137 m for the panels, ears, and edging
- Pink: approx. 50 yd / 46 m for the strap, nose, and cheeks
- Orange: a small scrap, about 10 yd / 9 m, for the carrot
- Green: a scrap, about 5 yd / 4.5 m, for the carrot leaves
Hook: 3.5 mm. Go down one size from the yarn label. This matters more than anything else in the pattern.
Notions:
- 2 safety eyes, 10 mm
- Black embroidery thread for the mouth
- Small amount of fiberfill for the ears and carrot
- Yarn needle
- Stitch markers
- Optional: a small magnetic snap for the opening
Yarn tip: Pick cotton if you can. It has a bit of body and no stretch, which is why the finished bag stands up on its own. Acrylic works too, but crochet it very tightly.
Gauge
16 sc = 4 in / 10 cm in continuous rounds. If you get fewer stitches than that, drop another hook size. If your circle ends up bigger than about 7 in / 18 cm across, the bag will be roomier but softer.
Abbreviations (US Terms)
- ch: chain
- sc: single crochet
- inc: increase (2 sc in the same stitch)
- dec: decrease (sc 2 together)
- sl st: slip stitch
- MR: magic ring
- Rnd: round
- st(s): stitch(es)
- FO: fasten off
Work all rounds in a continuous spiral unless the pattern says otherwise. Mark the first stitch of each round.
Front Panel
With cream, start with a magic ring.
This is the standard flat-circle formula. Each round adds 6 stitches, so you can always check your count against the number in brackets.
- Rnd 1: 6 sc in MR (6)
- Rnd 2: inc in each st (12)
- Rnd 3: (sc 1, inc) × 6 (18)
- Rnd 4: (sc 2, inc) × 6 (24)
- Rnd 5: (sc 3, inc) × 6 (30)
- Rnd 6: (sc 4, inc) × 6 (36)
- Rnd 7: (sc 5, inc) × 6 (42)
- Rnd 8: (sc 6, inc) × 6 (48)
- Rnd 9: (sc 7, inc) × 6 (54)
- Rnd 10: (sc 8, inc) × 6 (60)
- Rnd 11: (sc 9, inc) × 6 (66)
- Rnd 12: (sc 10, inc) × 6 (72)
- Rnd 13: (sc 11, inc) × 6 (78)
- Rnd 14: (sc 12, inc) × 6 (84)
- Rnd 15: (sc 13, inc) × 6 (90)
Sl st in the next stitch, FO, and weave in the end. If your circle curls into a bowl shape, you’ve been a little short on increases, so pull out a round and recount. If it ruffles, you have too many.
Adding the face: Don’t add the safety eyes until you’ve looked at the finished circle. Lay it flat and decide where “up” is. Your bag will open along the top edge, so the face sits in the lower two-thirds. Put the eyes on Round 6, one on each side of the center and a stitch or two below the middle line, about 3 in / 7.5 cm apart. Secure the backs before moving on.
Back Panel
Repeat Rounds 1–15 exactly as for the front panel, then continue to the next step without fastening off. Keep the yarn attached, because the same yarn is used for the joining round below.
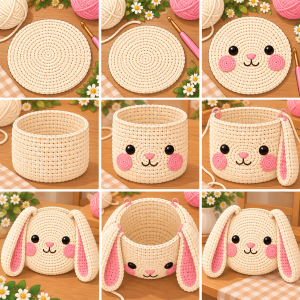
Cheeks (make 2)
With pink:
- Rnd 1: 6 sc in MR (6)
- Rnd 2: inc in each st (12)
Sl st, FO, and leave a tail. Sew them just below the eyes and slightly toward the outside.
Nose and Mouth
- Nose: Embroider a small pink triangle right at the center, about two rounds below the magic ring. Four to five stitches, laid side by side, will fill it in.
- Mouth: Use black embroidery thread to stitch a small “w” directly beneath the nose. Keep it small. A bunny mouth that’s too big looks worried.
Ears (make 2)
These are worked in the round and flattened. There’s no stuffing, only a little bit of fiberfill in the tip if you want them to curve.
With cream:
- Rnd 1: 6 sc in MR (6)
- Rnd 2: inc in each st (12)
- Rnd 3: (sc 1, inc) × 6 (18)
- Rnds 4–16: sc in each st around (18)
Sl st, FO, and leave a long tail. Flatten the tube so the open end is a straight seam, and gently press it with your fingers. Sew the open end to the top edge of the front panel, 3 in / 7.5 cm out from the center on each side. The ears should hang down over the sides like a lop rabbit’s.
If you like a pink inner ear, cut a small oval of pink felt and glue it inside the flattened ear before you sew it on. It takes about a minute and looks great.
Joining the Panels
You should still have the working yarn on the back panel. Hold the two panels with wrong sides together, so the seam will sit on the outside as a decorative ridge. Line up the stitches and mark the top center of both panels. Count 15 stitches to the left and 15 stitches to the right of that mark. Those 30 stitches stay open.
Starting at the end of the open section, sc through both loops of both panels, working around the bottom of the bag, for 60 stitches. Stop when you reach the beginning of the open section on the other side. Don’t fasten off yet.
Top Edge
Now work into the 30 open stitches of the front panel and the 30 open stitches of the back panel, one after the other, in a circle.
- Rnd 1: sc in each of the 60 stitches, and join with a sl st to the first sc.
- Rnd 2: ch 1, sc in each st around, and join with a sl st.
FO and weave in the end. If you want the opening to close on its own, sew a small magnetic snap inside the top edge, one half on each side.
Strap
With pink, ch 181. This is about 42 in / 107 cm, but you can make it as long or short as you like.
- Row 1: sc in the 2nd ch from the hook and in each ch across (180). Ch 1, turn.
- Row 2: sc in each st across. Ch 1, turn.
- Row 3: sc in each st across.
FO, leaving a 12 in tail at each end. The strap should be about 3/4 in / 2 cm wide.
Sew each end of the strap securely to the inside of the bag, right where the top edge meets the side seam. Sew it in a square with a cross through the middle. This is the spot that takes all the weight, so add a few extra stitches.
Carrot Charm (make 1)
With orange:
- Rnd 1: 6 sc in MR (6)
- Rnd 2: inc in each st (12)
- Rnds 3–4: sc in each st around (12)
- Rnd 5: (sc 2, dec) × 3 (9)
- Rnds 6–7: sc in each st around (9)
- Rnd 8: (sc 1, dec) × 3 (6)
- Rnds 9–10: sc in each st around (6)
Stuff lightly. Then work Rnd 11: dec × 3 (3). FO and close the hole.
Leaves: With green, join at the top of the carrot. Work (ch 4, sl st in the 2nd ch from the hook, sl st in each of the next 2 ch, sl st back into the carrot) three times, in three different spots along the top. That gives you three small leaves.
Attach the carrot to the strap or the bag’s side seam with a short loop of yarn.
Final Assembly
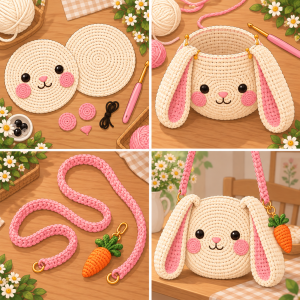
- Check the ears. Make sure they’re sewn firmly, since kids and bags both get handled a lot.
- Check the strap ends. Tug hard on both. If anything moves, sew it again.
- Add the carrot. Tie it on with a length of green yarn.
- Shape the bag. Give the whole thing a gentle press with your hands so the circle sits flat.
A Few Ways to Change It
Different animal: Swap the cream for brown and shorten the ears to make a bear. Make the ears one round shorter and sew them on top of the head in a rounded shape.
Mini version: Use fingering weight yarn and a 2.5 mm hook, and stop the panels at Round 10. That gives you a coin purse about 4.5 in / 11 cm wide.
Lined bag: If you want to carry heavier things, cut two circles of cotton fabric a little larger than the crochet panels, sew them together, and slip the lining inside before you finish the top edge.
Bigger bag: Add rounds 16 and 17 (continue the formula: sc 14 inc, then sc 15 inc). That takes the panels to 96 and 102 stitches, so adjust the number of joined stitches and the top opening accordingly.
I’d love to see how yours turns out. Share a photo in the comments, or tag me if you post it. Happy hooking!