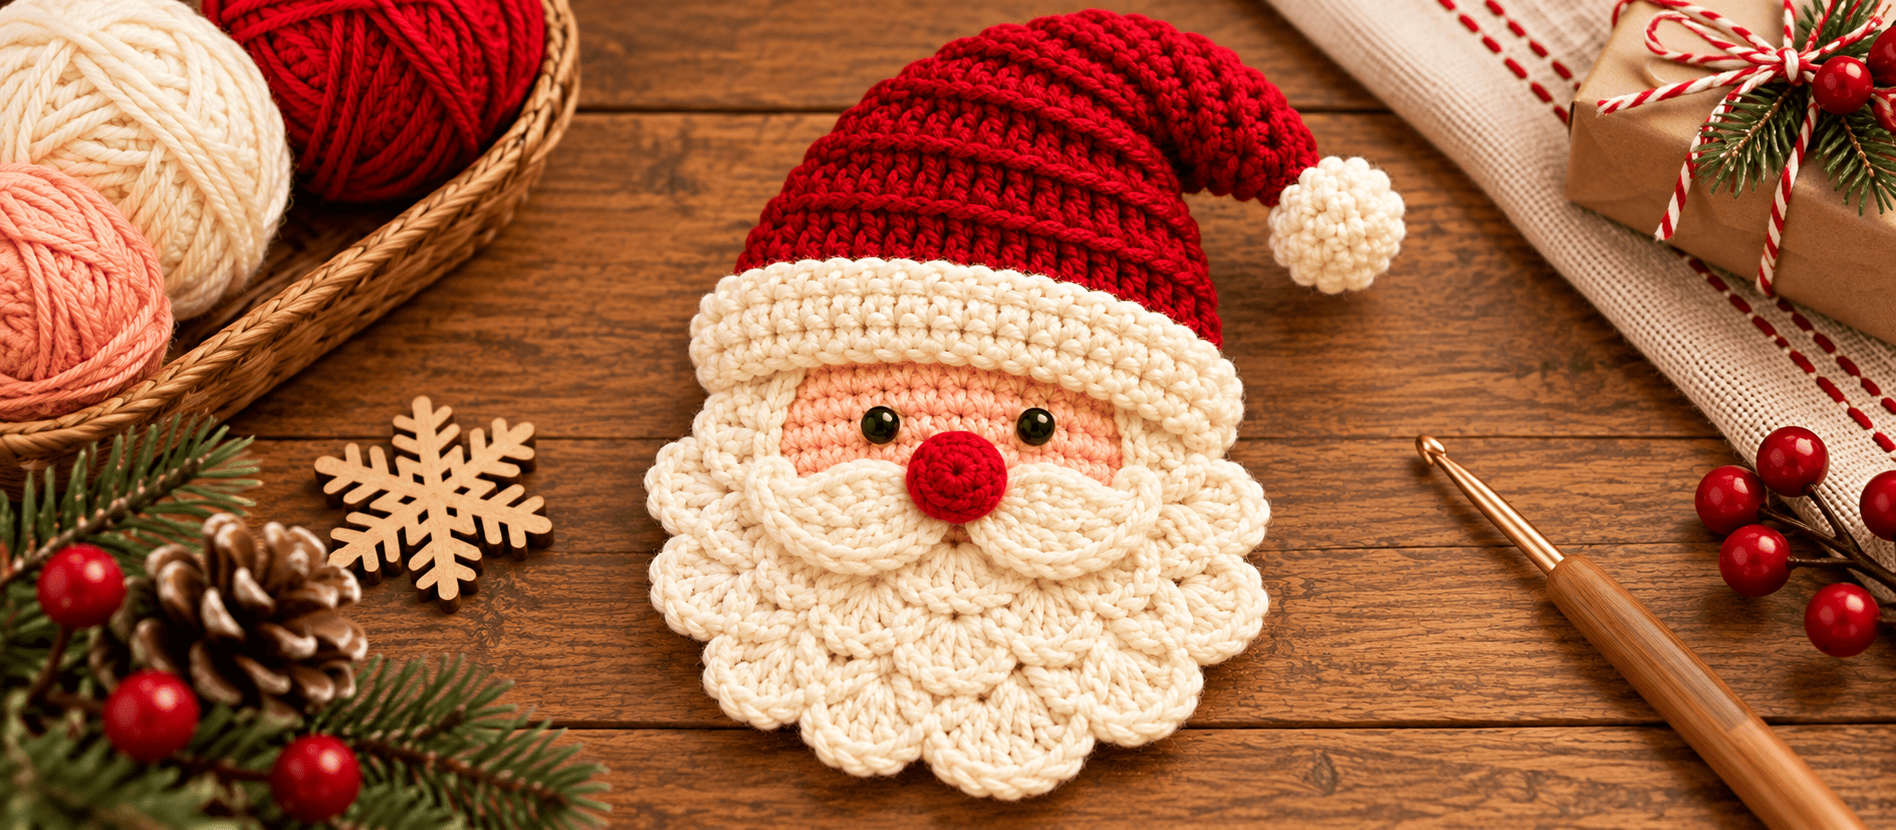
Every November my yarn basket turns into a Santa factory. I used to make full amigurumi Santas, but they ate up stuffing and shelf space. Then I tried a flat applique, and now I make a dozen at a time. They go on gift bags, tote bags, stockings, the tree, and the front of a Christmas card.
Most Santa patterns I found were red and white, and the hat, brim and face were worked as one fiddly piece. I made mine in separate parts: face, beard, hat, brim, mustache. That way each one is easy to crochet and you can recolor any piece without redoing the others. I also swapped the classic red for a deep wine hat and a warm cream beard. It looks softer and a bit more grown-up, and it goes with most wrapping paper.

Finished Size
- Width: approx. 3.5 in / 9 cm
- Height (with hat and pom): approx. 4 in / 10 cm
- Face only: approx. 1.4 in / 3.5 cm
Skill Level
Beginner-friendly. You should know magic ring, single crochet, double crochet, single crochet decrease, slip stitch and working in the back loop only (BLO).
Materials

Yarn (100% cotton, worsted weight):
- Color A (Wine / Burgundy): ~20 yd / 18 m, hat
- Color B (Warm Cream): ~45 yd / 41 m, beard, brim, mustache, pom
- Color C (Soft Peach): ~8 yd / 7 m, face
- Color D (Dusty Rose): ~3 yd / 3 m, nose
Hook: 3.5 mm (US E-4). Go one size down from what your yarn label says, so the fabric stays firm.
Notions: 2 black half-round beads (6 mm) or black embroidery floss, a handful of fiberfill, a yarn needle, a stitch marker, and optional felt, ribbon or a pin back for the back.
Gauge
5.5 sc = 1 in / 2.5 cm. Gauge isn’t critical for an applique, but a tight fabric matters. Cotton at this tension keeps its shape, especially in the beard scallops.
Abbreviations
- ch – chain
- sc – single crochet
- dc – double crochet
- inc – 2 sc in the same stitch
- sc2tog – single crochet 2 together
- BLO – back loop only
- sl st – slip stitch
- MR – magic ring
- FO – fasten off
Beard, face, nose and pom are worked in continuous rounds. Hat and brim are worked flat in rows.
Beard (Color B)
- Rnd 1: 6 sc in MR (6)
- Rnd 2: inc around (12)
- Rnd 3: (sc 1, inc) x6 (18)
- Rnd 4: (sc 2, inc) x6 (24)
- Rnd 5: (sc 3, inc) x6 (30)
- Rnd 6: (sc 4, inc) x6 (36)
- Rnd 7: (sc 5, inc) x6 (42)
- Rnd 8: (sc 6, inc) x6 (48)
- Rnd 9 (scallops): *sc in next st, skip 2 sts, 5 dc in next st, skip 2 sts; repeat from * 8 times. Sl st to the first sc to join. (8 shells)
FO and weave in the end. The shells always curl a little. I pin mine flat on a foam mat, mist with water and let them dry overnight.
Face (Color C)
- Rnd 1: 6 sc in MR (6)
- Rnd 2: inc around (12)
- Rnd 3: (sc 1, inc) x6 (18)
- Rnd 4: (sc 2, inc) x6 (24)
Sl st, FO, leaving a 12 in tail for sewing.
Hat (Color A)
Ch 17.
- Row 1: sc in 2nd ch from hook and across (16). Ch 1, turn.
- Rows 2–5: sc2tog, then sc BLO to the end (15, 14, 13, 12). Ch 1, turn each row.
- Rows 6–9: sc2tog, sc BLO to the last 2 sts, sc2tog (10, 8, 6, 4). Ch 1, turn each row.
- Row 10: sc2tog twice (2). Ch 1, turn.
- Row 11: sc2tog (1).
FO, leaving a long tail. Working in BLO gives the hat its ribbed look, and decreasing on one side first makes the tip tilt, so the hat looks like it flops over.
Brim (Color B)
Ch 18.
- Row 1: sc in 2nd ch from hook and across (17). Ch 1, turn.
- Rows 2–3: sc across (17). Ch 1, turn after Row 2.
FO, leaving a long tail.
Mustache (make 2, Color B)
Ch 5. Starting in the 2nd ch from hook: sl st, sc, hdc, 4 dc in the last ch. Working up the other side of the chain: hdc, sc, sl st. FO with a tail.
Nose (Color D)
- Rnd 1: 6 sc in MR (6)
- Rnd 2: (sc 1, inc) x3 (9)
- Rnd 3: sc around (9)
- Rnd 4: (sc 1, dec) x3 (6)
Stuff lightly, close with the tail, FO.
Pom-pom (Color B)
- Rnd 1: 6 sc in MR (6)
- Rnd 2: inc around (12)
- Rnd 3: sc around (12)
- Rnd 4: dec around (6)
Stuff, close, FO with a tail.
Assembly

I tried a few orders, and this one gives the cleanest result:
- Face first. Pin it slightly above the center of the beard and sew it down with a small whip stitch.
- Hat next. Lay the hat over the top third of the face, with the tip curving to the right. Sew along the bottom edge.
- Brim. Place it over the hat’s lower edge so it hides the seam. Let the ends overlap the beard a little. That overlap gives the fluffy trim look.
- Mustache. Sew the two teardrops under the future nose, angled down and outward.
- Nose goes in the middle, where the mustaches meet.
- Pom goes on the hat tip. Sew it through the tip itself so it doesn’t flop.
- Eyes last. Sew them just under the brim, about 4 stitches apart.
Sew the eyes on last. The first time, I did them early, and the whole face looked surprised after the brim went on.
A Few Ways to Switch It Up

Other palettes I love:
- Golden Hour: mustard hat, oatmeal beard, soft tan face
- Lavender Frost: lilac hat, ivory beard, rosy nose
- Forest Night: deep green hat, cream beard, peach face
Ornament: Sew a loop of thin ribbon behind the hat tip and cut a felt circle to cover the back.
Gift topper: Skip the felt and sew the Santa straight onto a tote bag or a plain kraft box.
Bigger? Use chunky yarn and a 5 mm hook with the same stitch counts, and you get a coaster-sized Santa.
Cotton or acrylic? Acrylic works, but cotton holds the scallops and the hat ribbing much better. If you use acrylic, block it with a damp cloth.
If you make this one, I’d love to see your colors. Everyone’s Santa ends up with a slightly different expression, and that’s the best part. Happy hooking!