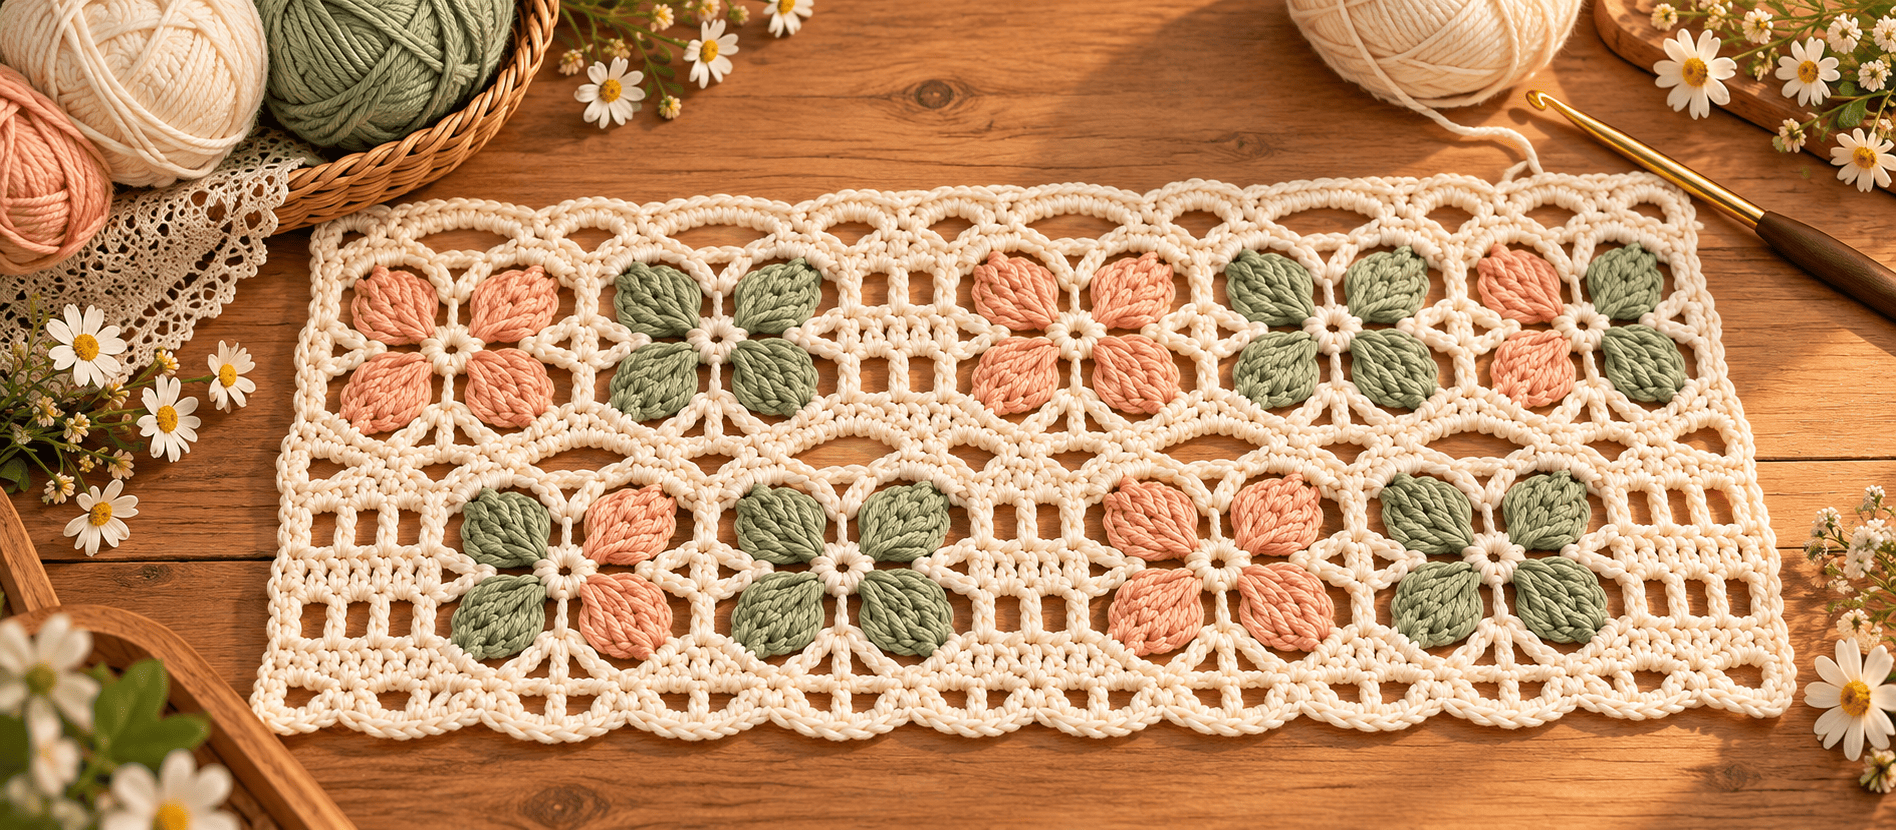
The first time I saw a four-petal lace stitch like this, I assumed it was worked in puff stitch. I tried it, and the petals came out squishy and uneven, and the holes between them closed up. After three failed swatches I stopped fighting the stitch and thought about the shape instead.
A flower with four petals is really two petals pointing up and two pointing down, all meeting in the middle. So I stopped making four separate petals. Instead, I make a cluster that narrows to a point, then a shell that fans out of that same point. The petals come out smooth and symmetrical, and the tiny gap in the center appears by itself.
The other thing I changed was the layout. Most four-petal patterns stack the flowers in straight columns. I offset every second band by half a flower, so the blossoms sit like bricks. It takes one extra row variation and makes the fabric look far more intentional.
Finally, I skipped the usual single dusty-pink look. I color-blocked the petals, which costs nothing extra. More on that below.
Finished Size
- Each flower: about 3 in / 7.5 cm wide
- Each 6-row band: about 2.75 in / 7 cm tall
- Sample scarf (5 flowers wide, 6 bands): about 15 × 17 in / 38 × 43 cm before blocking
Skill Level
Confident Beginner to Intermediate. You need to know sc, dc, and how to work a basic decrease. The only unusual stitch is a 5-dc cluster, explained below. The row repeat is easy to memorize after the first band.
Materials
- Color A (Cream): worsted weight cotton blend, about 200 yd / 183 m for the sample scarf
- Color B (Sage Green): about 80 yd / 73 m, for the petals in odd-numbered bands
- Color C (Dusty Peach): about 80 yd / 73 m, for the petals in even-numbered bands
- Hook: 5.0 mm (US H-8). This is larger than the yarn label suggests, on purpose. The lace needs room to drape.
- Notions: yarn needle, scissors, blocking pins
Yardage is an estimate from my swatch. Your tension decides the rest, so buy one extra ball of your cream if you can.
Gauge
One 12-stitch repeat (one full flower) should measure about 3 in / 7.5 cm wide. Gauge matters less than the drape. If the fabric feels stiff like a coaster, go up a hook size. If you can see big gaps in the petals, go down.
Abbreviations (US terms)
- ch – chain
- sc – single crochet
- dc – double crochet
- sk – skip
- sp – space
- CL – cluster (see Special Stitches)
- Shell – 5 dc in the same stitch
- RS / WS – right side / wrong side
- n – number of flowers across
Special Stitches
5-dc Cluster (CL): Yo, insert hook in next stitch, yo, pull up a loop, yo, pull through 2 loops. Repeat from * in each of the next 4 stitches (6 loops on hook). Yo and pull through all 6 loops.
Shell: Work 5 dc in the same stitch.
How the Stitch Works
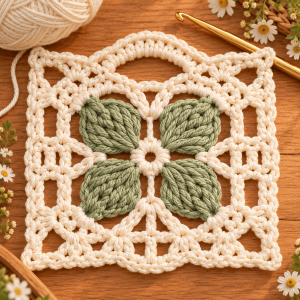
Think of one flower as two columns. In each column, the cluster (wide at the bottom, pointed at the top) is the lower petal. The shell worked into the cluster’s point is the upper petal. Two columns side by side make four petals. The arches and ladder rows above them hold the flowers apart and give the lace its airy look.
Pattern Notes
- The pattern is worked in rows over a multiple of 12 stitches + 1.
- Foundation chain: 12n + 2. For a 3-flower swatch, chain 38. For the 5-flower scarf, chain 62.
- Every band is 6 rows. Odd bands use the aligned Row 2, even bands use the offset Row 2.
- Work the cluster row on the wrong side. This pushes the clusters toward you on the right side, which gives the petals their rounded, sculpted look.
- The turning chain does not count as a stitch unless the instructions say so.
The Pattern
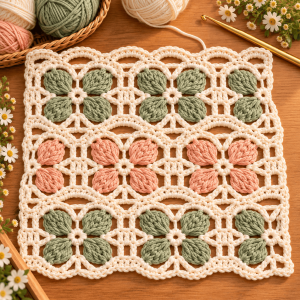
Band Row 1 (RS) – Base Row, Color A
First band only: Chain 12n + 2. Sc in the 2nd chain from the hook and in each chain across. (12n + 1 sc)
Every later band: Ch 1, turn. Sc in each dc and in each ch-1 sp across. (12n + 1 sc) Change to Color B (odd bands) or Color C (even bands) on the last sc.
Row 2 (WS) – Cluster Row, Color B or C
Aligned (odd bands): Ch 1, turn. Sc in the first st. CL over the next 5 sts, sc in the next st. Repeat from * across, 2n times. (12n + 1 sts)
Offset (even bands): Ch 1, turn. Sc in each of the first 7 sts. CL over the next 5 sts, sc in next st, CL over the next 5 sts, sc in next st. Repeat from * (n − 1) times. Sc in each of the last 6 sts. (12n + 1 sts)
Row 3 (RS) – Shell Row, same color
Ch 1, turn. Sc in each sc. Work a Shell (5 dc) in the top of each CL. (12n + 1 sts) Change to Color A on the last sc.
Row 4 (WS) – Arch Row, Color A
Ch 1, turn. Sc in each sc. Over each shell, ch 5 and skip all 5 dc. (12n + 1 sts)
Row 5 (RS) – Ladder Row 1, Color A
Ch 3 (counts as dc), turn. Over each ch-5 arch, work ch 1, dc in the arch, ch 1, dc in the arch, ch 1. Work 1 dc in each sc between arches.
Offset band edges: where there is a stretch of plain sc, work ch 1, sk 1, dc in the next st to keep the ladder going. (12n + 1 sts)
Row 6 (WS) – Ladder Row 2, Color A
Ch 3 (counts as dc), turn. Ch 1, sk next ch-1 sp, dc in next dc. Repeat from * across, ending with a dc in the top of the turning ch-3. (12n + 1 sts)
Repeat Rows 1–6 for the length you want, alternating aligned (odd) and offset (even) versions of Row 2. For the scarf, I worked 6 bands and finished with a Row 1 base row so the top edge matches the bottom edge.
My Color Plan: Sage & Peach on Cream
Every stitch in the pattern is the same as the plain pink version, so the colors are what make it look new:
- Cream (A) for the base rows, arches and ladders. It acts like a quiet frame, so the petals stand out.
- Sage (B) for petals in bands 1, 3, 5.
- Peach (C) for petals in bands 2, 4, 6.
Because the petals only take 2 rows per band, you won’t want to carry yarn up the side for 4 rows. I cut and weave in as I go, or crochet over the tails as I work the next row. It saves a lot of time at the end.
Finishing & Blocking
- Weave in all ends along the base rows, not through the petals.
- Wet-block the piece. Soak it in lukewarm water, press out the water in a towel, and pin it flat. Pull each arch gently into a smooth curve and make sure the ladders are straight.
- Let it dry completely. The lace opens up and the petals settle into their shape.
Blocking changes this pattern more than almost any other lace I’ve made. Unblocked, the cluster tips look a bit tight. After blocking, you can see the tiny center gap in every flower.
Mistakes I Made (So You Don’t Have To)
- Working the cluster row on the RS. The clusters sank back and the petals looked flat. Turning the work and making them on the WS fixed it immediately.
- Skipping the stitch count. The pattern only works if every row ends at 12n + 1. I count after every row of the first band. After that it becomes automatic.
- Pulling the arches too tight. Keep the ch-5 loose. If it puckers, the whole row of flowers above it will tilt.
- Using a hook that matched the yarn label. My first swatch with a 4.0 mm hook looked like a placemat. The 5.0 mm gave the soft drape I was after.
Ways to Switch It Up
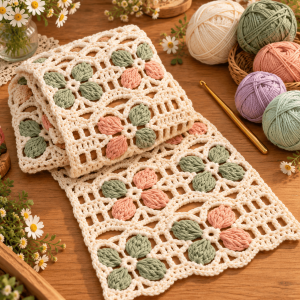
Other colorways to try:
- Navy & Mustard on Ivory: bold and graphic, good for a table runner.
- Lilac & Mint on White: soft spring shawl.
- One-color version: dusty rose throughout is gorgeous and calm, like the original inspiration.
Make it bigger or smaller:
- Shawl: chain 12n + 2 with n = 7 (ch 86) and work 8–10 bands. Add a ruffled edge if you like.
- Curtain panel or table runner: use cotton and a slightly smaller hook for a crisper fabric.
- Baby blanket: use a soft DK yarn and a 4.0 mm hook, and keep the same stitch counts.
Add an edging: one round of sc, then a round of picots, gives the edges a delicate finish.
Final Thoughts
This stitch looks complicated, but it is really just two simple pieces (a cluster and a shell) repeated in a clear rhythm. Once you’ve done the first band, you’ll find the rest flows quickly. If you make one, I’d love to see your colors. Everyone’s palette turns out different, and that is my favorite part. Happy hooking!