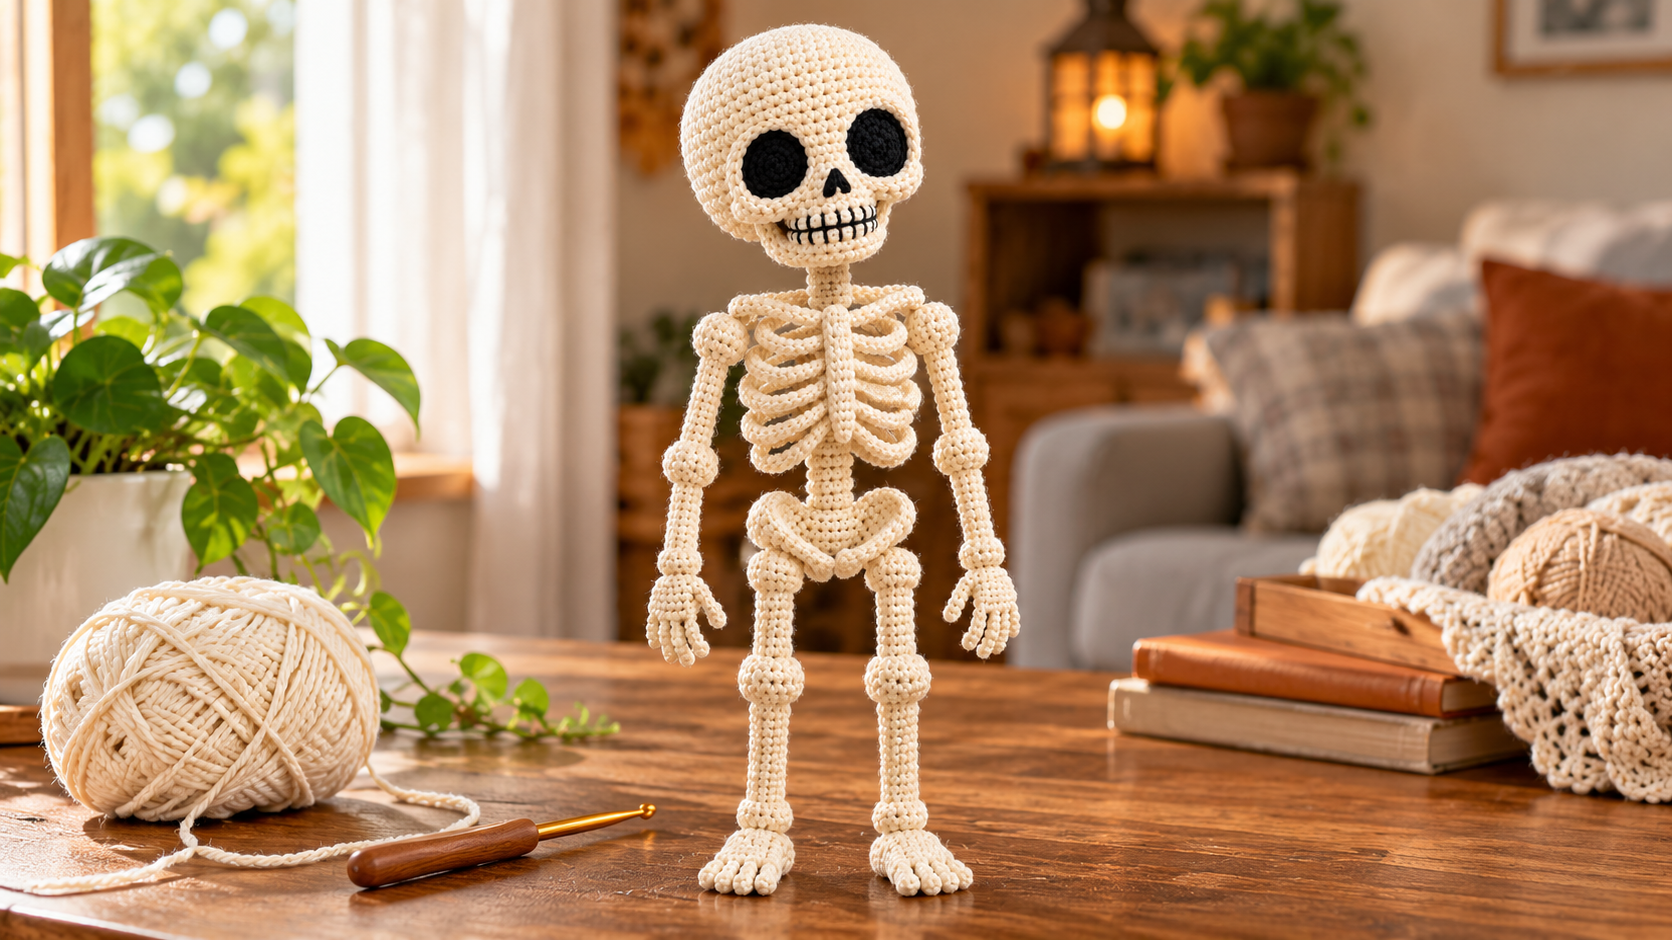
I’ll be honest: I never planned to make a skeleton. I was trying to use up a half skein of cream cotton, saw a long-limbed skeleton online, and thought, “How hard can the ribs be?”
Pretty hard, as it turned out. But after a few lopsided rib cages and one head that kept falling forward, I worked out a method I actually like. It’s built from simple tubes and chains, and the only fiddly part is sewing the ribs.
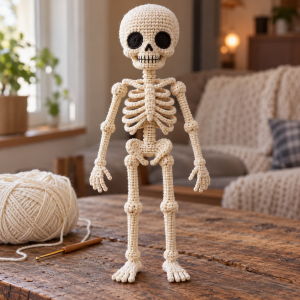
Here’s the pattern, along with the mistakes I made so you don’t have to.
What You’ll Make
- Height: about 12 in / 30 cm
- Skull width: about 2.75 in / 7 cm
- Arm span: about 9 in / 23 cm
Skill Level
Confident beginner. If you can do a magic ring, increases and invisible decreases, you can make this. The chain ribs look scary but are just slip stitches in a row.
Materials
- DK cotton yarn in cream or bone, about 140 yd / 128 m
- A scrap of black or dark brown yarn
- 2.5 mm hook (I size down so the stuffing never peeks through)
- Black felt for the eye sockets
- Polyester fiberfill
- 4 pipe cleaners, optional, for a poseable version
- Yarn needle, stitch markers, fabric glue
Choose cotton if you can. My first attempt in soft acrylic stretched out, and the arms ended up looking like cooked spaghetti. Cotton keeps the thin limbs crisp.
Abbreviations
MR magic ring, sc single crochet, inc 2 sc in one stitch, dec invisible decrease, ch chain, sl st slip stitch, FO fasten off. Work tubes in a spiral and mark the first stitch of every round. Stitch counts are in [brackets].
- Skull
- Rnd 1: 6 sc in MR [6]
- Rnd 2: inc in each st [12]
- Rnd 3: (sc 1, inc) x6 [18]
- Rnd 4: (sc 2, inc) x6 [24]
- Rnd 5: (sc 3, inc) x6 [30]
- Rnds 6-11: sc around [30]
- Rnd 12: (sc 3, dec) x6 [24]
- Rnds 13-14: sc around [24]
- Rnd 15: (sc 2, dec) x6 [18]
- Rnd 16: sc around [18]
- Rnd 17: (sc 1, dec) x6 [12]
Stuff firmly, then FO with a long tail.
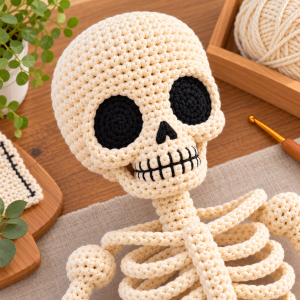
Face: Cut two slightly oval felt pieces and glue them between rounds 8 and 10, about 5 stitches apart. Stitch an upside-down “V” nose in dark yarn near round 12. For teeth, make short vertical stitches in cream across rounds 14-15, then separate them with a few thin dark lines.
I always pin the eyes first and walk away for ten minutes. Coming back with fresh eyes, pun intended, saves me from gluing them crooked.
- Neck and Spine
- Neck: MR 6, sc around for 6 rounds [6]. Lightly stuff and FO.
- Spine: MR 7, sc around for 24 rounds [7]. Stuff very firmly and FO.
The spine is the skeleton’s backbone in every sense. When mine was soft, the whole body slumped. If yours bends, push in more stuffing or add a pipe cleaner.
- Ribs and Sternum
Sternum (1): ch 11, sc in the 2nd ch from hook and across [10]. FO.
Ribs (make 8, as 4 matching pairs): ch the length below, sl st in the 2nd ch from hook and in each ch across. FO, leaving long tails.
- Pair 1: ch 11
- Pair 2: ch 13
- Pair 3: ch 12
- Pair 4: ch 10
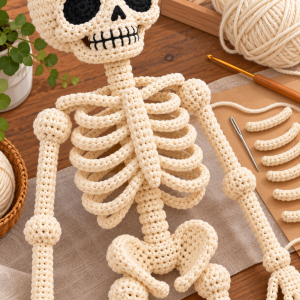
Collarbones (2): ch 9, sl st in the 2nd ch from hook and across. FO.
Slip stitch chains curl naturally, which is exactly what you want for rib curvature.
My first ribs were all the same length and the cage looked like a box. Varying the lengths, longest in the middle, fixed that instantly.
- Pelvis
- Rnd 1: 6 sc in MR [6]
- Rnd 2: inc in each st [12]
- Rnd 3: (sc 1, inc) x6 [18]
- Rnd 4: sc around [18]
Flatten the piece and sc across both layers to close [9]. FO with a long tail. Pinch the center and take two small stitches to create a dip, so it looks like a pelvis and not a pancake.
- Arms (make 2)
Upper arm
- Rnd 1: 6 sc in MR [6]
- Rnd 2: inc around [12]
- Rnd 3: dec around [6]
- Rnds 4-12: sc around [6]
- Rnd 13: inc around [12]
- Rnd 14: dec around [6]
Forearm: same as above, but work only 8 even rounds (rnds 4-11) and adjust the last two rounds to match.
Stuff lightly as you go. These knobby ends are what give you the elbow and shoulder “joints.”
Hand: ch 4, sc in the 2nd ch from hook and next 2 chs, then work 3 sc in the last ch, and continue along the other side [8]. Join with a sl st. For each of 3 fingers, ch 5, sl st in the 2nd ch from hook and back down, then attach to the hand. Add a shorter thumb with ch 4. Sew the hand to the forearm.
- Legs (make 2)
Thigh: same as the upper arm, but work 12 even rounds (rnds 4-15).
Shin: same as thigh, with 11 even rounds.
Foot: ch 6, sc in the 2nd ch from hook and next 3, 3 sc in the last ch, sc 4 along the other side [12]. Work 2 rounds of sc around. Add 4 toes as ch 3, sl st back down, attached along the front.
Toes are optional. Mine took forever, but they were what everyone asked about. If you’re short on time, make a plain foot and skip them
Assembly
- Sew the head to the neck, then the neck to the top of the spine. Go around twice, because heads get tugged a lot.
- Sew the sternum down the front of the spine, starting about 1 in below the neck.
- Attach each rib pair from the spine to the sternum, working from top to bottom. Pin everything before you commit.
- Add the collarbones across the top, then the arms at their outer ends.
- Sew the pelvis to the bottom of the spine, then attach the legs with a small gap between them.

Common Problems and Fixes
- The head falls forward: firm up the neck, or add a pipe cleaner from the spine into the skull.
- The ribs look uneven: sew pairs at the same time and compare both sides before knotting.
- The yarn looks gray: wash your hands first, and keep the project in a zip bag between sessions.
Ways to Customize
- Bigger skeleton: use worsted yarn and a 3.5 mm hook, no changes needed.
- Glow-in-the-dark: use glow yarn for a party version.
- Dress-up: add a tiny hat or bow tie.
- Safe version: embroider the eyes instead of using felt if it’s for a young child.
Frequently Asked Questions
How long does it take?
Roughly 8 hours spread over a few evenings. The assembly takes longer than the crocheting itself.
Can I sell what I make from this pattern?
Please credit this pattern if you sell finished items, and don’t resell or redistribute the pattern itself.
Do I need the pipe cleaners?
No. They just let you pose the arms and legs.
If you make one, I’d love to see it. Leave a photo or a comment and tell me what you named yours. Happy hooking!