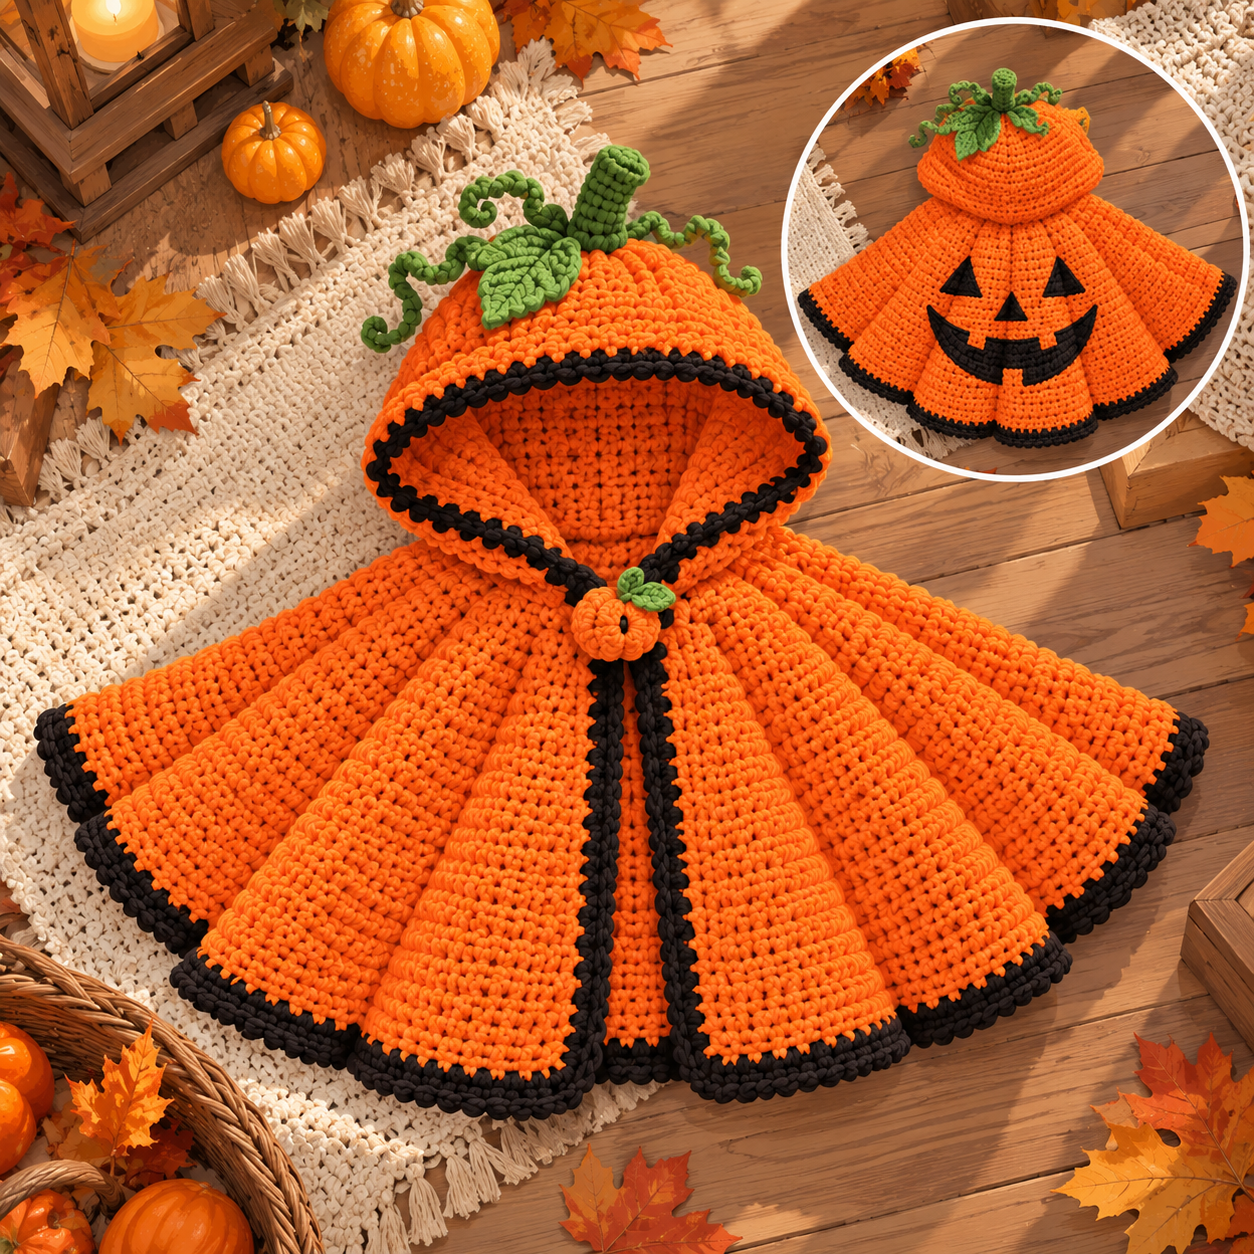
Most crochet pumpkin costumes put all the fun on the front, where the wearer can’t even see it. I wanted the opposite: a cape where the best part is the back. So this one has a big jack-o-lantern grin across the shoulders, and every house on the block gets to see it as your little trick-or-treater walks away.
The rest is deliberately simple. The cape is worked flat from the neck down in half double crochet, with eight “pumpkin segments” that fan out as you go. The hood is one plain rectangle you fold and seam, so there’s no cone shaping to keep track of. A tiny stuffed pumpkin button holds the front closed.
Want a different size? The sizing notes are at the bottom.
Finished Size
- Neckline (before hood): approximately 17 in / 43 cm
- Length, neck to hem: approximately 11 in / 28 cm
- Hem circumference: approximately 47 in / 119 cm
- Hood height, neck to crown: approximately 8.5 in / 21.5 cm
- Fits: 2T to 4T
Skill Level
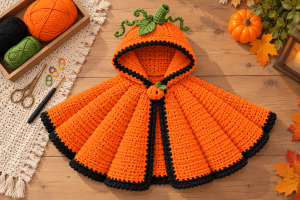
Confident Beginner. You should be comfortable with chaining, half double crochet, working in the back loop only, and basic seaming. Everything is worked flat, so there’s no magic ring or continuous-round counting until the tiny button.
Materials
Yarn (Worsted Weight / US 4):
- Color A (Pumpkin Orange): ~450 yd / 410 m for the cape, hood, and button
- Color B (Black): ~50 yd / 46 m for the trim and jack-o-lantern face
- Color C (Leaf Green): ~20 yd / 18 m for the stem, leaves, and vine
Buy a little extra orange, around 500 yd, so you’re never sweating the last few rows. A soft, machine-washable acrylic is ideal for a child’s costume.
Hooks:
- US J-10 / 6.0 mm for the cape and hood
- US I-9 / 5.5 mm for the small details
Notions:
- 8 stitch markers
- Yarn needle
- Polyester fiberfill (a small handful)
- Scissors
Gauge
With the 6.0 mm hook, half double crochet: 13 sts and 10 rows = 4 in / 10 cm.
To swatch, chain 20 and work 14 rows of hdc, then measure the middle. Gauge matters more than usual here because the neckline only has 56 stitches. One stitch off per 4 inches changes the fit around the neck. Too many stitches per 4 in? Go up a hook size. Too few? Go down.
Abbreviations (US Terms)
- ch — chain
- sl st — slip stitch
- sc — single crochet
- hdc — half double crochet
- dc — double crochet
- sc2tog — single crochet 2 together (decrease)
- inc — increase (2 stitches in the same stitch)
- BLO — back loop only
- MR — magic ring
- rev sc — reverse single crochet (crab stitch)
- st(s) — stitch(es)
- FO — fasten off
Turning chains never count as stitches in this pattern.
How the Cape Is Built
The cape is divided into 8 panels. On every even row you add one stitch to each panel, so the cape widens evenly and drapes into a gentle A-line shape.
The first stitch of each panel is your ridge stitch. Work it in the back loop only, and it leaves a small vertical line running down the cape, just like the ribs on a real pumpkin. Prefer a smooth cape? Ignore the markers and the BLO instructions. Everything else stays the same.
Cape Body (worked flat, top to bottom)
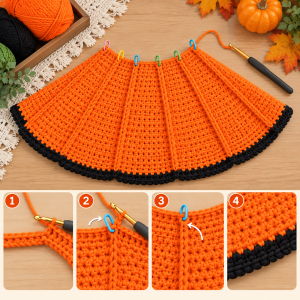
With Color A and the 6.0 mm hook, ch 58.
- Row 1: hdc in the 3rd ch from hook and in each ch across. Turn. (56 hdc, 8 panels of 7)
- Row 2 (increase row): ch 2. 2 hdc in next st, hdc in next 6. Repeat from * 8 times. Place a marker in the first hdc of every pair. These are your ridge stitches. (64)
- Row 3: ch 2, hdc in each st across. Work the marked stitches in BLO and move each marker up as you go. (64)
From here the pattern repeats. On every increase row, work 2 hdc (both in BLO) into each marked stitch, then hdc in the rest of that panel. Move the marker to the first stitch of the pair. On every plain row, hdc across, working the marked stitches in BLO.
- Rows 4–5: increase row, then plain row. (72)
- Rows 6–7: increase row, then plain row. (80)
- Rows 8–9: increase row, then plain row. (88)
- Rows 10–11: increase row, then plain row. (96)
- Rows 12–13: increase row, then plain row. (104)
- Rows 14–15: increase row, then plain row. (112)
- Rows 16–17: increase row, then plain row. (120)
- Rows 18–19: increase row, then plain row. (128)
- Rows 20–21: increase row, then plain row. (136)
- Rows 22–23: increase row, then plain row. (144)
- Rows 24–25: increase row, then plain row. (152)
- Rows 26–28: plain rows, no increases. (152)
FO and weave in the ends. A light steam (hover the iron, don’t press) helps the panels relax.
Quick check: each panel should have 19 stitches at the end. If your total isn’t 152, count the panels and see where a stitch went missing.
Hood (worked flat as a rectangle)
With Color A and the 6.0 mm hook, ch 30.
- Row 1: hdc in the 3rd ch from hook and in each ch across. Turn. (28 hdc)
- Rows 2–42: ch 2, hdc in each st across. Turn. (28 hdc)
FO, leaving a 40 in / 100 cm tail for sewing.
Folding the hood:
- Fold the rectangle so the foundation chain edge meets the last row. The fold, between rows 21 and 22, becomes the top of the head.
- Choose one short side to be the back. Whipstitch those two edges together, 21 row-ends on each side. This is the back seam.
- Pinch the top-back corner, where the fold meets the seam, and take a few small stitches across it to round it into a soft dome.
The open side is the face opening.
Joining the Hood to the Cape
Turn the hood so the back seam is on the inside. Match the seam to the center back of the cape’s neckline, between stitch 28 and stitch 29 of the foundation chain. The hood’s bottom edge has 56 stitches (28 from each layer), which matches the 56 chains along the cape’s neck.
Pin, then whipstitch from the inside with the leftover tail, one hood stitch to one neckline chain. The hood’s face opening should end right at the top of each cape front edge.
Black Trim
Join Color B at the bottom right front corner of the cape.
- Rnd 1: sc evenly up the right front edge (about 1 sc per row end), around the face opening of the hood (1 sc per row end), and down the left front edge. Work 3 sc in the bottom left corner, sc across the hem (152 sc), then work 3 sc in the last corner and sl st to join.
- Button loop: on the way up the right front edge, when you reach the top, ch 8 and sl st in the same stitch, then continue.
- Rnd 2: ch 1, don’t turn. Rev sc in every st around. FO and weave in the ends.
The exact stitch count isn’t critical here. Adjust so the edge lies flat and doesn’t ruffle or pull.
Stem (Color C, 5.5 mm hook)
- Rnd 1: 6 sc in MR (6)
- Rnds 2–6: sc around (6)
- Rnd 7: inc around (12)
- Rnds 8–9: sc around (12)
FO, stuff lightly, and sew the base to the top-back corner of the hood.
Leaves (make 2, Color C)
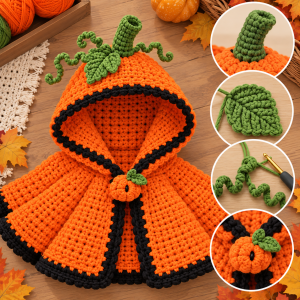
Ch 9. Sl st in the 2nd ch from hook, sc in next, hdc in next, dc in next 2, hdc in next, sc in next. Work 3 sl st in the last ch to turn the corner. Working along the other side of the chain: sc, hdc, dc in next 2, hdc, sc, sl st in the last ch. FO. Sew the rounded end to the base of the stem.
Curly Vine (Color C)
Ch 25. Work 2 sc in the 2nd ch from hook and in every ch across. (48 sc) It coils up on its own. Sew it beside the stem.
Pumpkin Button (Color A, 5.5 mm hook)
- Rnd 1: 6 sc in MR (6)
- Rnd 2: inc around (12)
- Rnds 3–4: sc around (12)
- Rnd 5: (sc 1, sc2tog) x4 (8)
Stuff firmly.
FO and pull the tail tight to close. Add one tiny stitch of green yarn on top for a stem. Sew the button to the left front edge, level with the loop on the right.
Jack-o-Lantern Face (Color B, 5.5 mm hook)
Eyes (make 2):
Ch 7.
- Row 1: sc in the 2nd ch from hook and across (6)
- Row 2: ch 1, turn, sc2tog, sc in next 2, sc2tog (4)
- Row 3: ch 1, turn, sc2tog x2 (2)
- Row 4: ch 1, turn, sc2tog (1)
FO, leaving a tail for sewing.
Mouth:
Ch 19.
- Row 1: sc in the 2nd ch from hook and across (18)
- Rows 2–3: ch 1, turn, sc across (18)
FO, leaving a tail.
[Image: back of the cape with the jack-o-lantern face. Alt text: “Crochet pumpkin cape back with jack-o-lantern face”]
Assembly
- Eyes go on the back of the cape, about 3 in / 7.5 cm below the neckline and about 3 in apart, with the points facing up.
- Mouth goes about 6.5 in / 16.5 cm below the neckline. Curve it into a smile as you sew.
- Teeth are two or three short vertical stitches in Color A across the mouth. This is optional, but it makes the grin much more jack-o-lantern.
- Stem sits at the top-back corner of the hood, with the leaves and vine tucked around its base.
- Button goes on the left front edge, opposite the loop.
Weave in all remaining ends and give the cape a gentle shake so the panels settle. Then put it on your little pumpkin and take the back-view photo first.
A Few Ways to Switch It Up
Other sizes:
- 12–18 months: ch 50 (48 sts, 6 per panel). Work increase rows 2 through 18, then plain rows to row 22. Hood: ch 26 (24 sts wide), 38 rows.
- 5T–6T: ch 66 (64 sts, 8 per panel). Work increase rows 2 through 26, then plain rows to row 34. Hood: ch 34 (32 sts wide), 46 rows.
Whatever size you make, the hood’s bottom edge should always equal the neckline stitch count, half from each layer.
Making it for a child under 3? Skip the stuffed button and the sewn-on face pieces. Embroider the face in black yarn instead, and use a large snap or toggle inside the front. Check that the stem, leaves, and vine are sewn on securely.
Not into pumpkins? Swap the orange for white and skip the stem, and you have a ghost cape. Swap it for green and you have a frog. The construction stays the same.
Cape curling at the hem? Your gauge is probably too tight. Go up a hook size, or block it lightly, and it will relax.
Hood feeling snug? Add 2 to 4 rows to the hood, always an even number so the fold stays centered.
Care: machine wash gently in cool water and lay flat to dry. Skip the dryer, since heat can flatten acrylic yarn.
If you make this cape, I’d love to see it. Drop a photo in the comments, or tag me if you post it. Happy hooking, and don’t let the hood scare you off. It’s just a rectangle, folded.