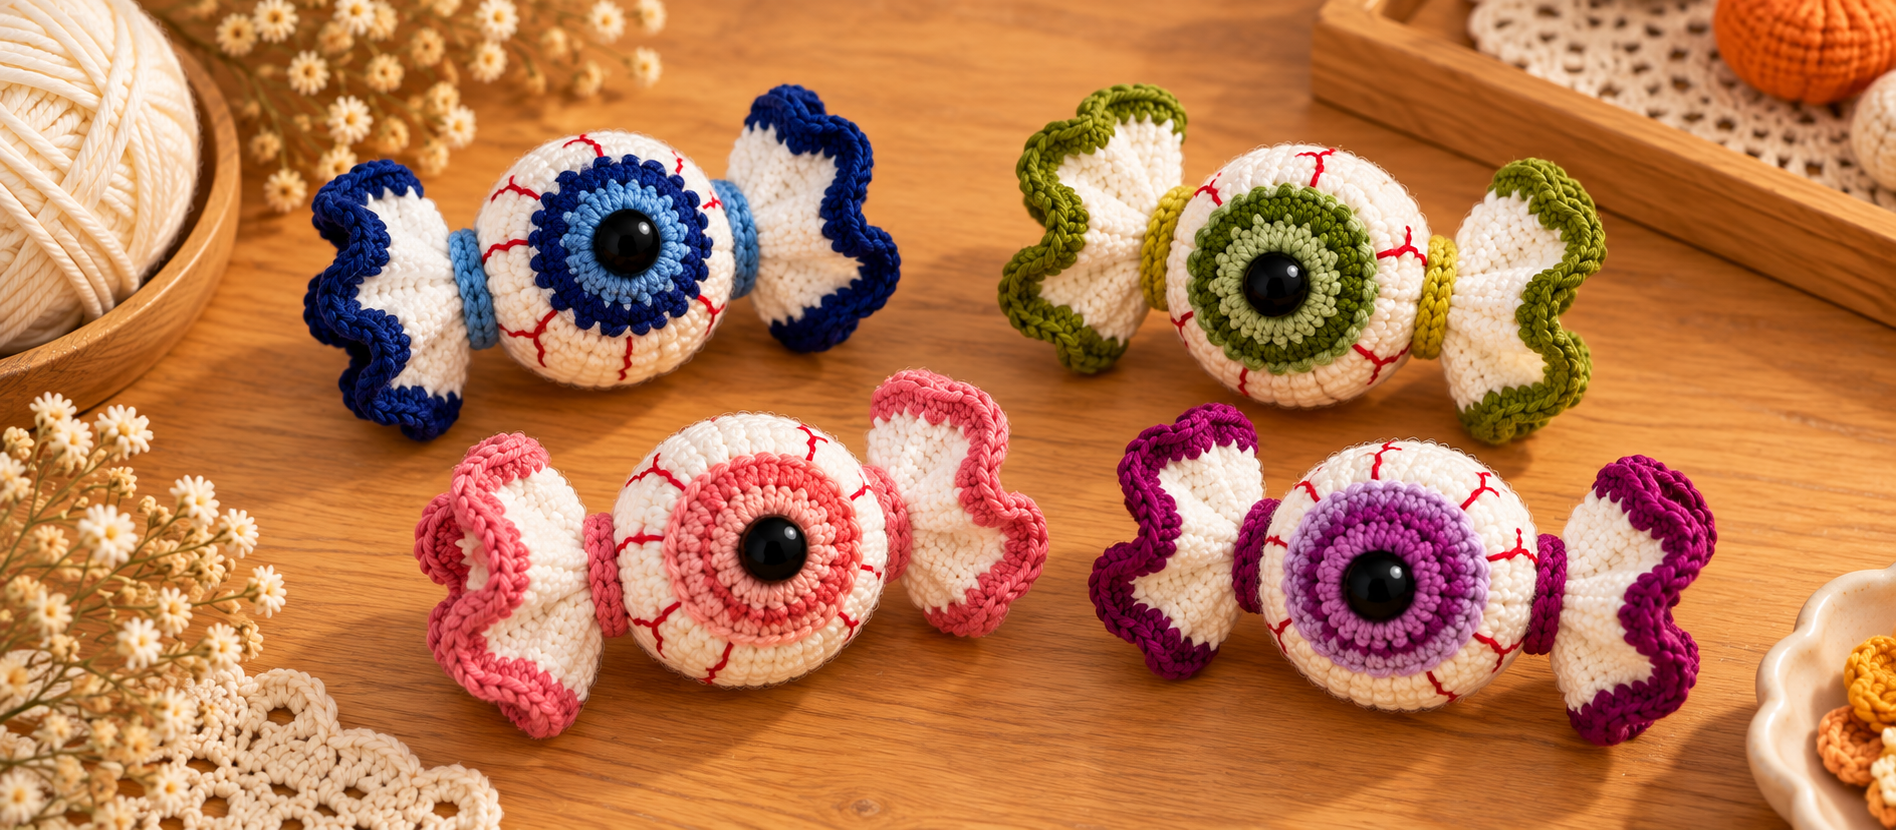
Every October my craft table turns into a graveyard of half-finished spooky things. This year, I wanted something that was creepy and cute at the same time, and small enough to finish in one evening with a cup of tea. That’s how this eyeball candy was born.
I’d seen a few versions online with colorwork built into the eyeball itself. They look great, but I’m honest with you: carrying yarn around a tiny sphere makes my tension go haywire every single time. So I changed the approach. The iris is a small flat disc you sew on afterward, and the wrapper is one simple ruffle strip. No tapestry crochet, no bobbles, nothing scary except the eyeball itself.
They also make excellent party favors. I made a bowl of six in different colors and my nephew refused to let me keep any.
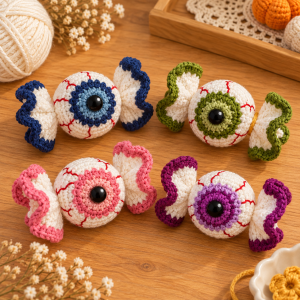
Finished Size
- Eyeball: about 2 in / 5 cm across (DK cotton)
- Total length with wrappers: about 5 in / 12.5 cm
- Worsted weight and a 4 mm hook will give you a slightly bigger candy, about 6 in / 15 cm long
Skill Level
Confident Beginner. You need magic ring, single crochet, increases, and invisible decreases. The ruffle looks fancy, but it’s just increasing in every stitch.
Materials
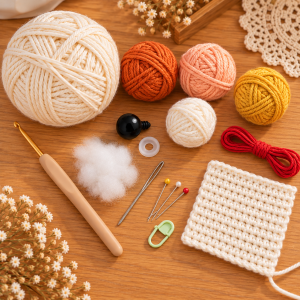
Yarn (DK weight cotton, my favorite for amigurumi because it holds its shape):
- Color A (White): ~40 yd / 36 m — eyeball and wrapper
- Color B (Dark iris, e.g. burnt orange): ~5 yd / 4.5 m
- Color C (Light iris, e.g. peach): ~5 yd / 4.5 m
- Color D (Wrapper edge, e.g. mustard yellow): ~15 yd / 14 m
- Color E (Red embroidery floss or thin red yarn): for the veins
Hook: 3.5 mm (US E-4)
Notions:
- 1 black safety eye, 10–12 mm (this is the pupil)
- Polyester fiberfill
- Yarn needle
- Stitch marker
- Straight pins
- Optional: a small loop of cord if you want an ornament or keychain
Gauge
With Color A, 6 sc = 1 in / 2.5 cm in the round. Don’t obsess over it. What matters is a tight fabric so the fiberfill doesn’t peek through. If you can see white fluff between stitches, go down a hook size.
Abbreviations
- ch — chain
- sc — single crochet
- inc — 2 sc in the same stitch
- dec — invisible decrease (front loops only)
- MR — magic ring
- sl st — slip stitch
- FO — fasten off
- RS — right side
Work in continuous rounds unless the pattern says otherwise. Mark the first stitch of each round.
The Eyeball
With Color A:
- Rnd 1: 6 sc in MR (6)
- Rnd 2: inc around (12)
- Rnd 3: (sc 1, inc) x6 (18)
- Rnd 4: (sc 2, inc) x6 (24)
- Rnd 5: (sc 3, inc) x6 (30)
- Rnd 6: (sc 4, inc) x6 (36)
- Rnds 7–12: sc around (36)
- Rnd 13: (sc 4, dec) x6 (30)
- Rnd 14: (sc 3, dec) x6 (24)
- Rnd 15: (sc 2, dec) x6 (18)
Don’t close yet. Leave the eyeball open until after you’ve attached the iris (next section). Start stuffing lightly now.
The Iris (flat disc)
Here’s the trick that saved my sanity: the iris is worked flat, in rounds, and then sewn onto the eyeball.
With Color B:
- Rnd 1: 6 sc in MR (6)
- Rnd 2: inc around (12)
Switch to Color C:
- Rnd 3: (sc 1, inc) x6 (18)
- Rnd 4: (sc 2, inc) x6 (24)
Sl st into the next stitch, FO, and leave a 12 in tail for sewing.
Attaching the eye: Push the safety eye post through the center of the iris (right through the magic ring hole), then through the eyeball fabric at about Round 9, which is the middle of the sphere. Lock the washer from the inside. Pin the iris flat, then whip stitch around the outer edge using the tail. Take small stitches and pull gently so the disc sits snug without puckering.
Finish stuffing. Make the eyeball firm and round. Then finish the closing rounds:
- Rnd 16: (sc 1, dec) x6 (12)
- Rnd 17: dec around (6)
FO, thread the tail through the remaining 6 stitches, pull tight, and weave in the end.
The Veins
Cut a length of Color E, thread your needle, and anchor it under the iris edge. Make 4 or 5 uneven straight stitches radiating outward across the white, and add a tiny forked branch to one or two of them. Messy is better here. Perfectly even veins look like sunbeams, not bloodshot eyes.
I used a single strand of embroidery floss, which gives thin, realistic lines. If you only have yarn, split a strand into plies.
The Wrappers (make 2)
This is the part that makes it look like candy. Each wrapper is worked flat, and the ruffle comes from a big jump in stitch count.
With Color A, ch 12.
- Row 1 (RS): sc in 2nd ch from hook and in each ch across (11). Ch 1, turn.
- Row 2: inc in every st (22). Ch 1, turn.
- Row 3: sc in each st (22). Change to Color D on the last pull-through. Ch 1, turn.
- Row 4: inc in every st (44). Ch 1, turn.
- Row 5: sc in each st (44).
FO, leaving a 10 in tail. Don’t flatten it. Let it curl and wave naturally, because the waves are the whole point.
My very first wrapper came out flat and sad, because I only increased in every other stitch. Doubling every stitch is what gives you that wavy, wrapped-candy edge. If your ruffle still looks tame, add one more inc row in Color D.
Assembly
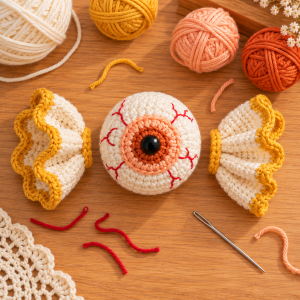
- Find the poles. The magic ring end and the closed end of your eyeball are the two “twists” of the candy. The iris sits between them.
- Pin the first wrapper with the narrow foundation edge (the 11-stitch side) against one pole. Curve the edge slightly around the pole so it hugs the sphere.
- Sew it on with the tail, going through every foundation stitch. Make the stitches small and tight, because this seam holds the candy together.
- Repeat on the opposite pole, then check from the front. Both ruffles should flare outward in the same direction, like a real wrapped candy twisted at both ends.
- Turn the whole thing so the iris faces you, and gently rotate the wrappers until the waves look balanced.
If you’re making an ornament, thread a short loop of cord through the top wrapper’s base before you sew it down.
Tips From My Own Mistakes
- Use cotton if you can. Acrylic stretches around the stuffing, and the eyeball ends up slightly lopsided. Cotton keeps it round.
- Pin before you sew the iris. Mine drifted off-center twice before I started pinning. A slightly off-center iris looks creepy in a good way, but a crooked one near the pole looks like a mistake.
- Steam the wrappers lightly if they curl too tightly. Hover the iron, never press.
- Keep the stuffing firm. Soft eyeballs wrinkle where the iris is attached.
Ways to Make It Your Own
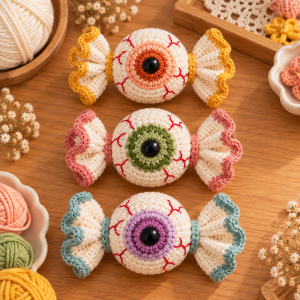
Different monsters: Swap the iris colors for yellow with a slit-pupil in black felt and you get a snake-eye candy. Use neon green and purple for a “toxic” version.
Garland: Make 8 to 10 in mixed colors and string them on a cord, with a small loop on each wrapper. It looks amazing across a mantel.
Bigger version: Worsted weight and a 4 mm hook give you a candy you can use as a desk toy. Use a 14 mm safety eye and add one extra even round to the middle section.
Gift bags: I tuck one into every Halloween gift bag. It beats plastic candy any day.
If you make one, please share a photo. Every eyeball ends up with a little personality, and I love seeing yours. Happy hooking, and may all your candy stare back.