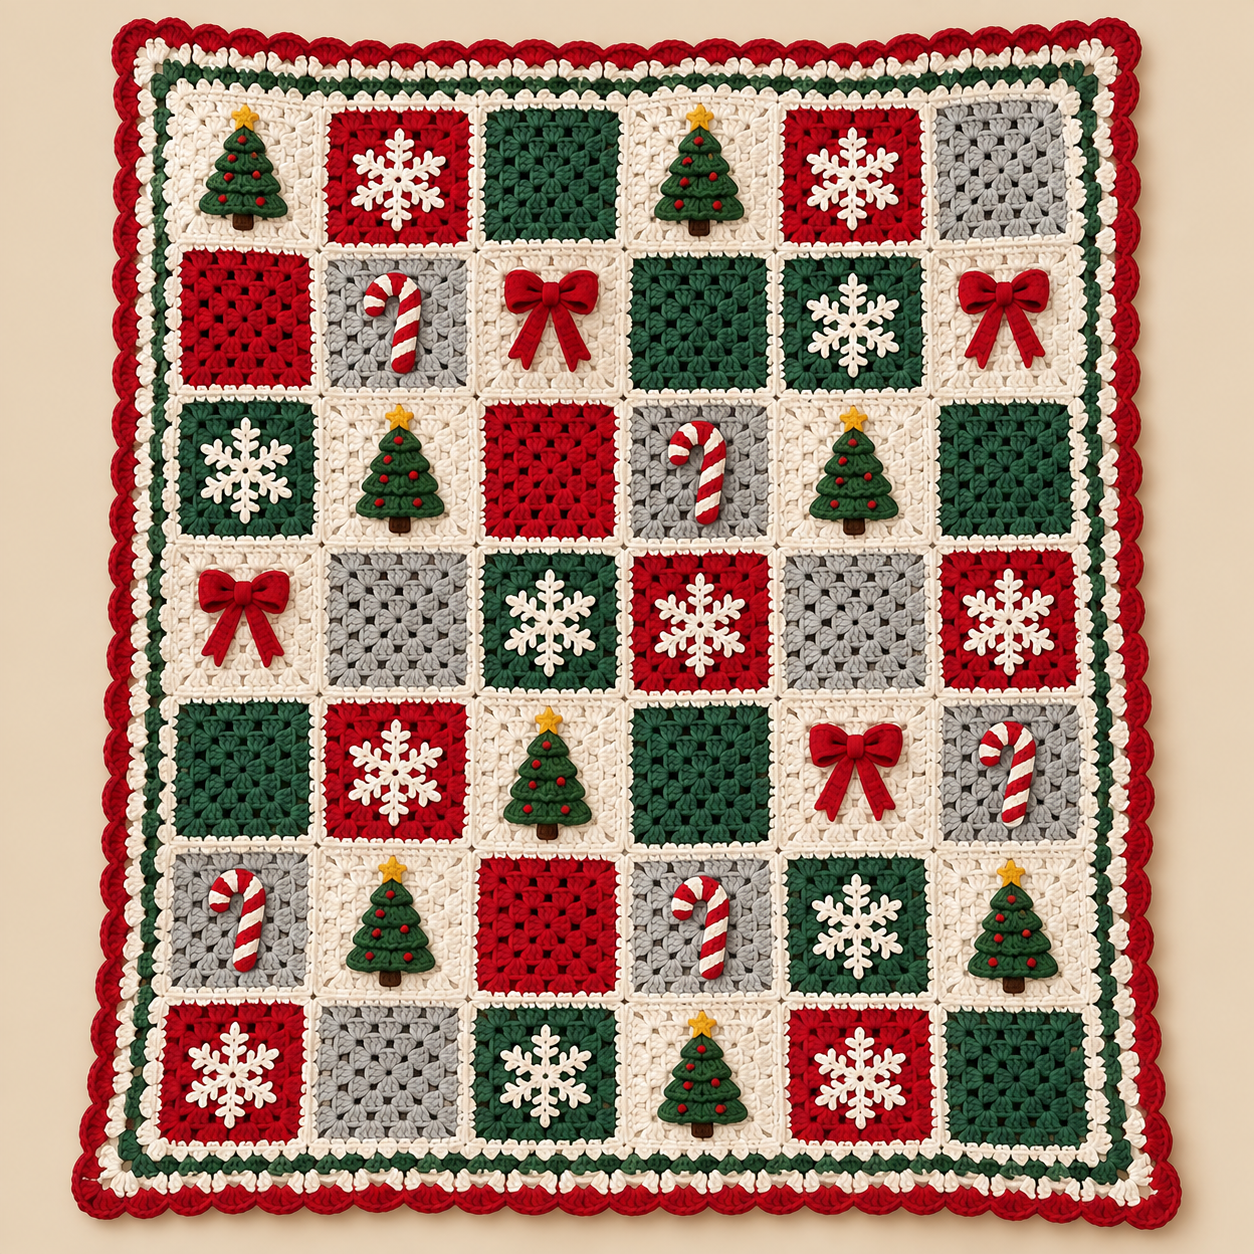
Most Christmas blankets fall into two camps. Either they’re all one color and a bit plain, or they’re covered in stitch-by-stitch colorwork that takes half the winter. This one sits in the middle. It’s made of simple granny squares, and the festive part comes from small motifs you crochet separately and sew on.
That second part is the trick. A tree or snowflake built into a square means counting stitches and ripping back when one arm goes wrong. A motif you make on its own can be redone in five minutes, and you can swap trees for snowflakes in any square without changing the pattern. Mix the colors however you like. I think the red, green, white and grey combination looks best, but a softer palette works too.
Finished Size
- Each square: approximately 6½–7 in / 16–18 cm
- Blanket (6 squares × 8 squares): approximately 44 × 58 in / 112 × 147 cm, including the border
- Total squares: 48

Skill Level
Confident Beginner. You should be comfortable with magic ring, chain, slip stitch, single crochet, double crochet, and decreasing. Sewing seams is the only other skill you need.
Materials
Yarn (Worsted Weight / US 4):
- Color A (White): ~1,900 yd / 1,740 m (5–6 skeins of 364 yd). Used for the frames, lace squares, joins and border.
- Color B (Red): ~800 yd / 730 m (2–3 skeins). Red squares, bows, tree trunks and border.
- Color C (Dark Green): ~900 yd / 820 m (3 skeins). Green squares, trees and border.
- Color D (Light Grey): ~500 yd / 455 m (2 skeins). Grey squares.
These amounts are estimates, since tension varies a lot from person to person. Buy one extra skein of white.
Hook: US H-8 / 5.0 mm
Notions:
- Yarn needle
- Scissors
- Stitch markers (optional, for pinning motifs)
- Fabric stiffener or spray starch (optional, for snowflakes)
Gauge
A finished 6-round square should measure about 6½–7 in / 16–18 cm. A better check is after Rnd 4, when it should be close to 5 in / 12.5 cm. If it’s much bigger or smaller, change your hook size now, not after 20 squares. Squares that all match are much easier to join later.
Abbreviations
- ch — chain
- sl st — slip stitch
- sc — single crochet
- hdc — half double crochet
- dc — double crochet
- sc2tog — single crochet two together
- sp — space
- MR — magic ring
- st(s) — stitch(es)
- Rnd — round
- FO — fasten off
A cluster is 3 dc. A corner is (3 dc, ch 2, 3 dc) in the corner space. Squares are joined at the end of each round with a sl st, and every beginning ch 3 counts as a dc.
The Color Plan
Every square gets a white Rnd 6. That white frame gives the blanket its frosty look. Make the squares in these combinations:
- Red squares (8): Red Rnd 1–5, white Rnd 6. Add a white snowflake.
- Green squares (6): Green Rnd 1–5, white Rnd 6. Add a white snowflake.
- White lace squares, trees (10): All white. Add a green Christmas tree.
- White lace squares, snowflakes (8): All white. Add a red or green snowflake.
- White lace squares, bows (4): All white. Add a red bow.
- Grey squares, candy canes (6): Grey Rnd 1–5, white Rnd 6. Add a candy cane.
- Grey squares, bows (6): Grey Rnd 1–5, white Rnd 6. Add a red bow.
When you lay everything out, scatter the colors like a checkerboard so no two reds or two trees touch. Take a quick phone photo of the layout so you don’t join the wrong squares later.
The Granny Square (make 48)
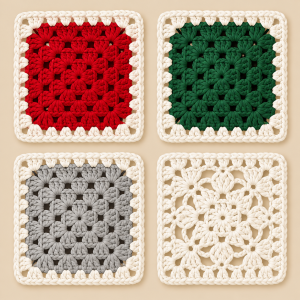
Make the first rounds in the main color for that square, as shown in the Color Plan.
- Rnd 1: Make a MR. Ch 3, 2 dc in ring, ch 2. (3 dc in ring, ch 2) 3 times. Join with a sl st to the top of the beginning ch 3 and pull the ring closed. (4 clusters, 4 corner spaces)
- Rnd 2: Sl st in the next 2 dc and into the first corner space. Ch 3, (2 dc, ch 2, 3 dc) in the same space. Ch 1. Work a corner in each remaining corner space, with a ch 1 after each one. Join.
- Rnd 3: Sl st to the first corner space. Ch 3, (2 dc, ch 2, 3 dc) in the same space. Ch 1, 3 dc in the next ch-1 space, ch 1, corner in the next corner space. Repeat around and join.
- Rnd 4: Repeat Rnd 3. Each new round adds one more cluster to every side.
- Rnd 5: Repeat Rnd 3. Fasten off the main color.
- Rnd 6: Join white in any corner space. Repeat Rnd 3 once more. There should now be 4 side clusters between each pair of corners. FO and weave in ends.
For the white lace squares, make all six rounds in white.
Snowflake (make 22: 14 white, 8 red or green)
- Rnd 1: Make a MR. Ch 1, 12 sc in ring. Join with a sl st to the first sc. (12)
- Rnd 2: Sc in the next sc, ch 7. Starting in the 2nd ch from the hook, sl st in each of the 6 chains back down the spoke. Sc in the next sc on the ring. Repeat 6 times. Join and FO.
For a frostier look, work a picot (ch 3, sl st in the same st) after the 3rd sl st of every spoke. Block flat and spray with stiffener if you want it crisp.
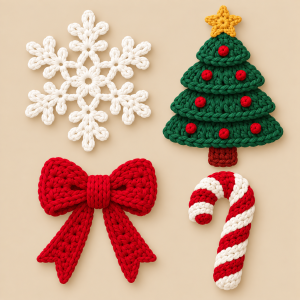
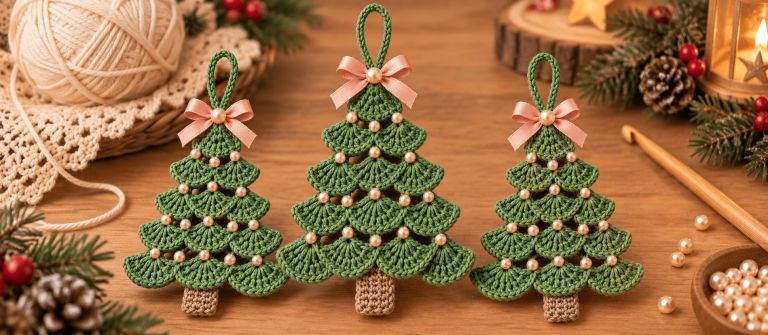
Christmas Tree (make 10)
Each tree has three tiers in green plus a red trunk. Every row is worked in sc, with sc2tog decreases at both ends.
Large tier:
- Row 1: Ch 11. Sc in the 2nd ch from the hook and across. Ch 1, turn. (10)
- Row 2: Sc2tog, sc in the next 6, sc2tog. Ch 1, turn. (8)
- Row 3: Sc2tog, sc in the next 4, sc2tog. Ch 1, turn. (6)
- Row 4: Sc2tog, sc in the next 2, sc2tog. Ch 1, turn. (4)
- Row 5: Sc2tog twice. Ch 1, turn. (2)
- Row 6: Sc2tog. FO. (1)
Medium tier: Ch 9 and work 8 sc across. Decrease the same way: 8, 6, 4, 2, 1.
Small tier: Ch 7 and work 6 sc across. Decrease 6, 4, 2, 1.
Trunk (red): Ch 4, sc in the 2nd ch from the hook and across (3 sc). Work 2 more rows of 3 sc. FO.
Stack the tiers with the small one on top and the large one at the bottom, overlapping each by about ½ in. Tuck the trunk under the large tier. Whip stitch it all together before sewing the tree onto a square.
Bow (make 10, all red)
- Bow body: Ch 11. Sc in the 2nd ch from the hook and across (10). Work 4 more rows of 10 sc, ch 1 and turn each time. FO, leaving a 12 in tail.
- Center: Pinch the rectangle in the middle and wrap the tail around it tightly. Secure.
- Knot: Ch 7, sc in the 2nd ch from the hook and across (6). Work 1 more row of 6 sc. Wrap it around the center and sew the ends together at the back.
- Ribbon tails (make 2): Ch 5, sc in the 2nd ch from the hook and across (4). Then decrease 4, 2, 1. Sew them behind the bow in a V.
Candy Cane (make 6)
- Strip: With white, ch 19. Sc in the 2nd ch from the hook and across (18). Work 2 more rows of 18 sc, ch 1 and turn each time. FO.
- Stripes: With red yarn and a yarn needle, stitch diagonal stripes across the strip, about one every other column.
- Shape: Bend into a J and tack down with a few stitches along the inside curve.
I prefer embroidering the stripes. Changing colors every three stitches on such a tiny strip means carrying yarn up the sides, and the stripes rarely come out crisp.

Assembly
- Block every square. Pin each one flat and hover a steamer over it without touching the yarn. Never press an iron directly on acrylic, because it melts.
- Sew on the motifs before joining the squares. It’s far easier to handle one square than a whole blanket. Center each motif, pin it, and stitch around the edges with small stitches in a matching color.
- Lay out all 48 squares in a 6 × 8 grid and check the color placement.
- Join the squares with white yarn and a yarn needle. Whip stitch through the back loops only, which keeps the seams flat. Join into 8 strips of 6 squares, then join the strips.
- Add the border. Work these rounds around the whole blanket:
- Rnd 1 (white): Join in any corner. Sc in every dc and every ch-1 space along each side. Sc once in each corner space where squares meet and 3 sc in each outer corner. Join.
- Rnd 2 (red): Ch 1, sc in every st around, 3 sc in each outer corner. Join.
- Rnd 3 (green): Repeat Rnd 2.
- Rnd 4 (green shells): Skip 2 sts, 5 dc in the next st, skip 2 sts, sl st in the next st. Repeat around. If you end up a stitch or two off, adjust at a corner instead of ripping back.
- Weave in all the ends carefully. A blanket gets a lot of tugging.
A Few Ways to Switch It Up
Want a bigger throw? Add squares to the grid, 7 × 9 gives you about 51 × 65 in. Buy extra yarn, roughly one extra skein for every 8 squares.
Not into red and green? Navy, silver and white make a lovely winter blanket. Or keep everything neutral and use a single red tree for contrast.
Want it faster? Skip the candy canes and bows, and make only snowflakes and trees. You’ll save hours and it still looks festive.
Washing: Machine wash cold on a gentle cycle and dry flat or on low heat, as long as your yarn label agrees.
If you make one of these, please send me a photo. I love seeing how each blanket turns out slightly different. Share it in the comments, or tag me if you post it online. Happy hooking!