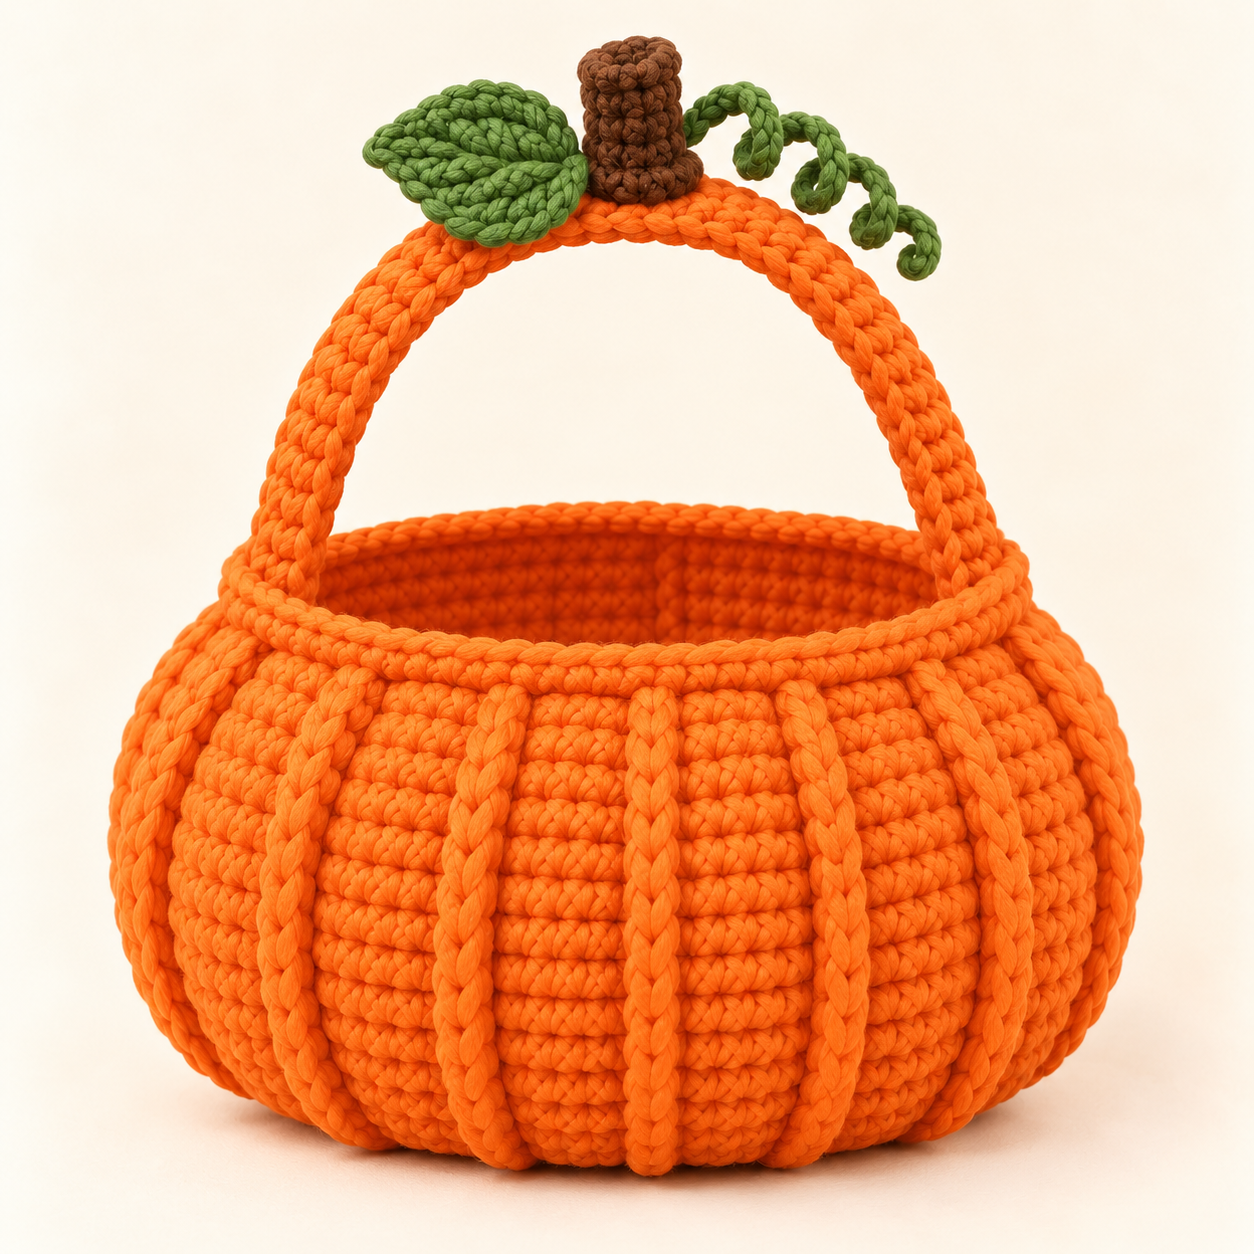
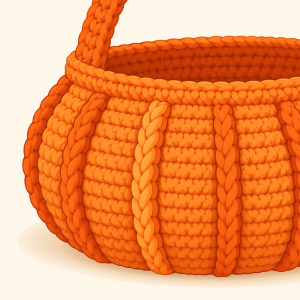
Search “crochet pumpkin basket” and you’ll find plenty of orange bowls with a stem stuck on top. They’re cute, but they don’t really look like pumpkins. What makes a pumpkin look like a pumpkin is the shape: a belly that swells out, a top that pulls back in, and grooves running from bottom to crown.
So this basket is built around that shape. The sides bulge and taper, ten raised ribs run up the body, and the handle arches over the top the way a real pumpkin’s crown does. The stem, leaf, and a curly little tendril sit right on the handle.
There’s one technique to pick up if you haven’t used it yet, the front post double crochet. It’s just a double crochet worked around the stitch instead of into it. Everything else is single crochet.
Finished Size
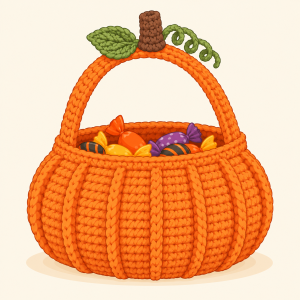
- Base diameter: approximately 4.5 in / 11 cm
- Widest point: approximately 5 in / 13 cm
- Height (without handle): approximately 3.5–4 in / 9–10 cm
- Handle length: approximately 12 in / 30 cm before attaching
Your numbers will shift slightly with your tension.
Skill Level
Confident Beginner. You should be comfortable with magic ring, single crochet, half double crochet, double crochet, and simple increases and decreases. Front post double crochet is explained in the abbreviations below.
Materials
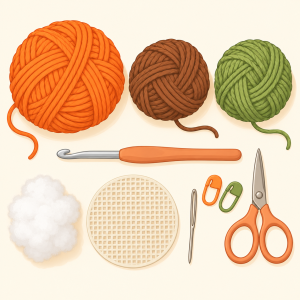
Yarn (Worsted Weight / US 4, 100% cotton):
- Color A (Pumpkin Orange): ~180 yd / 165 m for the basket and handle
- Color B (Chestnut Brown): ~10 yd / 9 m for the stem
- Color C (Leaf Green): ~20 yd / 18 m for the leaf and tendril
Yardage is an estimate. Keep a little extra orange on hand, just in case.
Hook: US G-6 / 4.0 mm
Notions:
- Polyester fiberfill (a small pinch, for the stem only)
- Yarn needle
- 2 stitch markers
- Scissors
- Optional: a circle of plastic canvas cut to fit the base, for extra structure
Why cotton? Acrylic tends to slump. Cotton is heavier and firmer, which is what a basket needs to stand up on its own.
Gauge
In single crochet, worked in continuous rounds: 17 sts and 18 rounds = 4 in / 10 cm.
Amigurumi-style projects are forgiving, but a basket is not. If your fabric feels floppy, go down a hook size. Tight stitches are what keep the sides upright.
Abbreviations
- ch: chain
- sl st: slip stitch
- sc: single crochet
- hdc: half double crochet
- dc: double crochet
- inc: increase (2 sc in same stitch)
- sc2tog: single crochet 2 together (decrease)
- BLO: back loop only
- MR: magic ring
- rnd: round
- st(s): stitch(es)
- FPdc (front post double crochet): yarn over, insert hook from the front, around the post of the stitch below, and back out to the front. Pull up a loop and finish like a regular dc. The post stitch uses up one stitch of the previous round, so it still counts as one stitch.
The basket is worked in a continuous spiral, so don’t join rounds. Put a marker in the first stitch of each round and move it up as you go. Use your second marker on the first FPdc of the sides, so you can keep the ribs lined up.
Base
With Color A:
- Rnd 1: 6 sc in MR (6)
- Rnd 2: inc around (12)
- Rnd 3: (sc 1, inc) x6 (18)
- Rnd 4: (sc 2, inc) x6 (24)
- Rnd 5: (sc 3, inc) x6 (30)
- Rnd 6: (sc 4, inc) x6 (36)
- Rnd 7: (sc 5, inc) x6 (42)
- Rnd 8: (sc 6, inc) x6 (48)
- Rnd 9: (sc 7, inc) x6 (54)
- Rnd 10: (sc 8, inc) x6 (60)
- Rnd 11: sc in BLO around (60)
This BLO round makes the corner that turns the flat base into upright sides. Don’t skip it.
Sides
Your 60 stitches are now split into 10 ribs. Each rib begins with one FPdc, so that’s the stitch to mark.
- Rnd 12: (FPdc, sc 5) x10 (60)
- Rnd 13 (belly grows): (FPdc, inc, sc 4) x10 (70)
- Rnds 14–17: (FPdc, sc 6) x10, 4 rounds even (70)
- Rnd 18 (belly narrows): (FPdc, sc2tog, sc 4) x10 (60)
- Rnds 19–21: (FPdc, sc 5) x10, 3 rounds even (60)
Each FPdc goes around the post of the FPdc directly below it. That stacking is what builds the raised columns.
Rim
- Rnds 22–23: sc around (60)
Sl st in the next stitch and FO, leaving a 6 in tail. Weave in the end.
Handle
With Color A, ch 56.
- Row 1: sc in 2nd ch from hook and across (55). Ch 1, turn.
- Rows 2–4: sc across (55). Ch 1, turn after each row except the last.
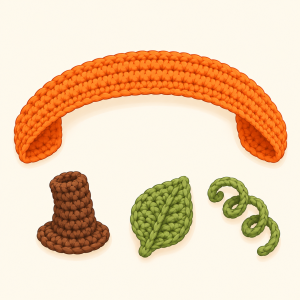
FO, leaving a long tail at each end. The handle should be about 12 in / 30 cm long and about 1 in / 2.5 cm wide.
Stem
Worked from the top down, with Color B:
- Rnd 1: 6 sc in MR (6)
- Rnds 2–5: sc around (6)
- Rnd 6: inc around (12)
- Rnd 7: sc around (12)
FO, leaving a long tail. Stuff lightly. It only needs enough fill to stand up, not enough to look round.
Leaf (make 1)
With Color C, ch 10.
- Side 1: sl st in 2nd ch from hook, sc, hdc, dc, dc, hdc, sc, sl st (working into chs 2–9)
- Tip: 3 sc in last ch
- Side 2: working into the unused loops on the other side of the chain, sl st, sc, hdc, dc, dc, hdc, sc, sl st
FO, leaving a short tail for sewing. The leaf should be about 2 in / 5 cm long.
Tendril (make 1)
With Color C, ch 21. Work 2 sc in 2nd ch from hook, then 2 sc in each ch across (40). FO, leaving a tail at each end.
It will curl up on its own. Let it. Don’t stretch it straight.
Assembly
- Handle: Ten ribs means the opposite side of the rim is exactly five ribs away. Find those two points and sew the handle ends to the rim, going through the rim stitches so the join is firm.
- Stem: Fold the handle in half to find the middle and sew the stem there.
- Leaf and tendril: Sew both at the base of the stem, side by side.
- Weave in all ends.
Before you sew anything permanently, hold the handle against the rim to check the arch. Then step back. You’ve got a pumpkin with a proper crown.
A Few Ways to Switch It Up
Want it taller? Add 2 or 3 more even rounds in the middle section (Rnds 14–17). Keep the FPdc ribs going, and everything else stays the same.
Not feeling orange? Cream or pale peach gives a “fairy tale pumpkin” look. Black with an orange stem is great for a spooky table.
Want extra structure? Cut a circle of plastic canvas to fit the base and slip it in. Add a fabric lining if you want to keep small treats from slipping through the gaps.
No handle? Skip it and you have a decorative pumpkin bowl. Move the stem and leaf to the rim.
If your ribs look flat, your hook is probably going into the top of the stitch instead of around the post. If they wander sideways, a stitch was skipped or doubled somewhere. Count the stitches between FPdcs and you’ll find it fast.
If you make one of these, I’d love to see it. Drop a photo in the comments or tag me if you post it. Happy hooking!